Unity Setup#
Adding MiddleVR to your Unity application#
Import the MiddleVR package#
-
Open the Packet Manager: Click in
Window > Package Manager -
Click on
+and chooseAdd package from disk...
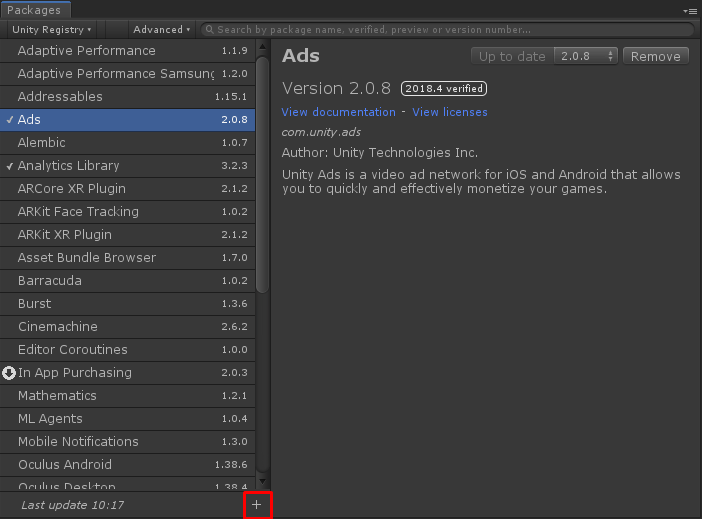
- Locate
C:\Program Files\MiddleVR2\unity_packages\MiddleVR\package.json:

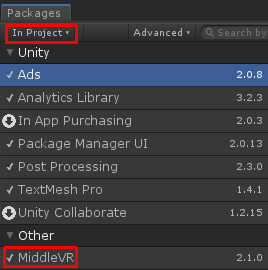
The package will then be imported and you can see that the plugin
is correctly installed if you click in In Project:
Add the VR manager to your scene#
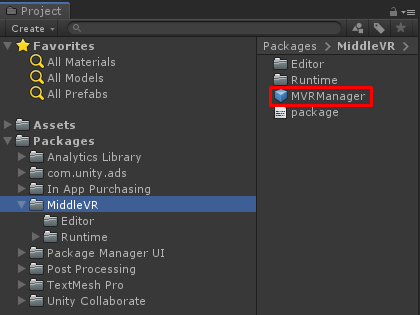
Open the Packages\MiddleVR folder in the Project tab and
drag and drop the MVRManager prefab to the Hierarchy tab of your
project:
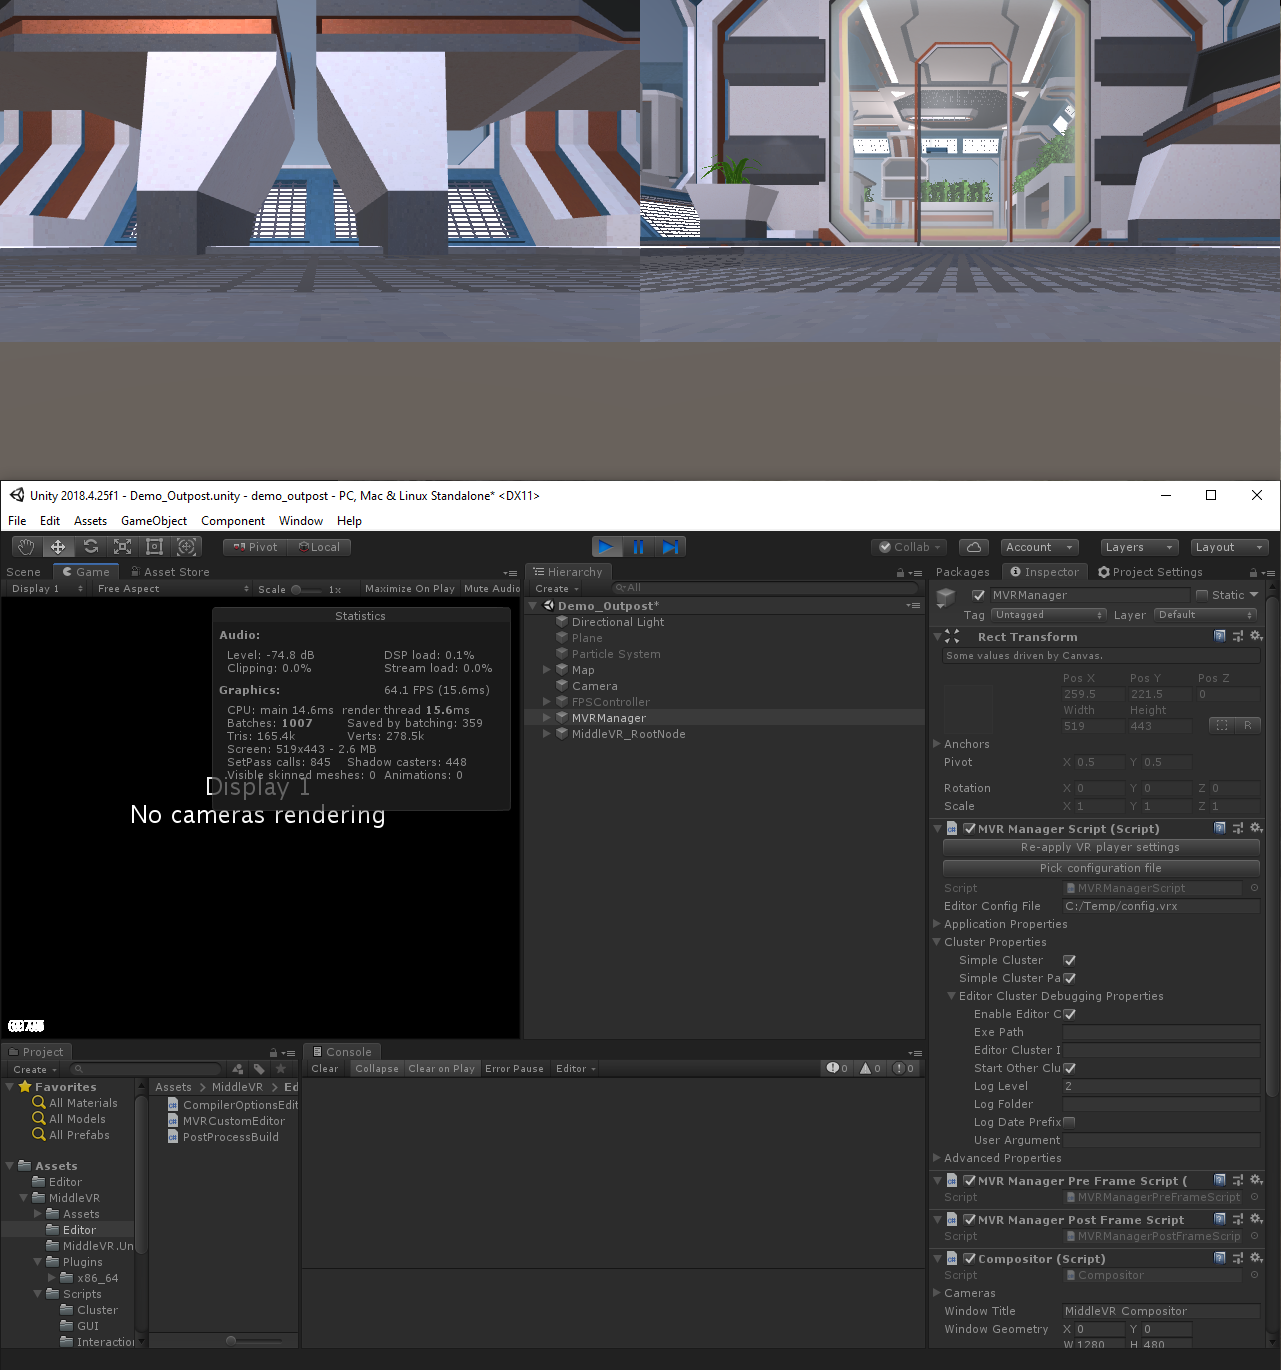
MVRManager#
Introduction#
The MVRManager is simply a Unity GameObject with several scripts
attached to it:
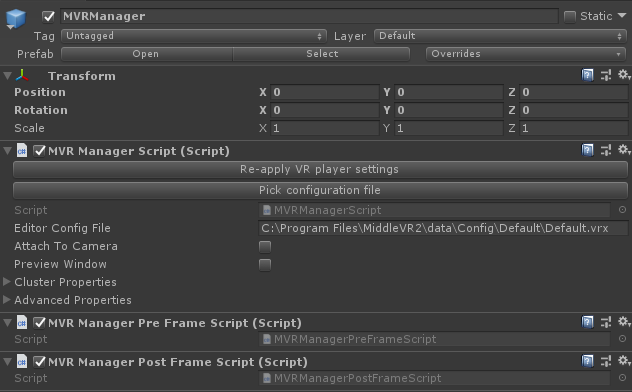
Those scripts handle all the management of 3D nodes, cameras, viewports, devices, clustering.
The MVRManager will initialize MiddleVR with the specified options,
especially the configuration file. It will create the 3D hierarchy of nodes
that you've specified in MiddleVR Config and the cameras with
their respective viewports.
Runtime#
As soon as you have configured the MVRManager, you are ready to run your application.
It will then create at runtime the whole MiddleVR nodes hierarchy under the the MVRManager by creating a Game Object for each 3D node, including Screens. The Template Camera will be duplicated for each MiddleVR camera found in the VR hierarchy.

If you change the configuration file, the MiddleVR nodes hierarchy will be recreated at runtime based on this newconfiguration file. This will ensure that your application is always up to date with your graphics system.
You can safely parent the MVRManager to any GameObject in your scene for a correct starting point or on your navigation.
If you enable "Attach To Camera", the MVRManager will automatically reparent itself to the first active camera. This can be useful in a lot of cases to minimize conversion steps of an existing application to MiddleVR.
Note: Unless you use the Preview Window, the geometry and aspect ratio of the viewports created by MiddleVR will look different than what they will be in the player. This is because the size of the Unity Game view cannot be programmatically changed
Note: Unless you use the Preview Window, active stereoscopy will not be displayed while in Unity editor. Only one eye will be displayed in monoscopy.
MiddleVR automatically disables any existing camera (that don't have a render texture) of your scene for performance reason. Indeed, the more cameras render their view, the slower your application might be. You can change this behavior with the "Disable Existing Cameras" option.
It will then automatically update MiddleVR, and reflect all the updates of 3D nodes and cameras to Unity.
All the devices data will also be updated so you have the latest information about your input devices.
Note: The MVRManager will not have any effect on your application before you press play. More precisely, no object of the VR hierarchy (3D nodes, cameras, screens) will be created unless you run your application.
MVRManager properties#
- Editor Config File : The path to the configuration file that should be used.
- Attach To Camera : Parent the MVRManager to the first active camera.
- Preview Window : See Preview Window.
-
Cluster
- Simple Cluster : See section "Simple Cluster".
- Simple Cluster Particles : Enable/disable synchronization on a cluster for particles.
- Editor Cluster Debugging Properties : See Editor Cluster Debugging.
-
Advanced Properties
- Show Wand: Show the Wand geometry.
- Show FPS: Display the number of frames per second. Pressing Shift-D (like "D"ebug) will toggle display on/off.
-
Template Camera: Specific camera to use to create all MiddleVR cameras. See Template Camera.
-
Disable Existing Cameras : Will parse the scene to find existing cameras that don't belong to the MiddleVR hierarchy and disable them. This is mainly done for performance reasons.
-
Quit On ESC : When running a standalone player, will exit the application if the Escape key is pressed.
- Show Screen Proximity Warnings : Show proximity visual warning when the head or another watched node is too close to a screen.
Template camera#
A template camera can be configured as an option of the MVRManager.
If you set the Template Camera option to be an existing camera in your scene, this camera will be duplicated for each VR camera instead of creating a new one. This is useful if you want to have on all VR cameras scripts (like image effects [SSAO, Blur...]), parameters (clear color), or any other component like Flare Layers, GUILayer etc.
If you don't set a camera, MiddleVR will use the first active camera in your scene. If no active camera is found, MiddleVR will create a new camera.
Note: Some post-processing effects might not work when using active stereoscopy / clustering. See sections URP & HDRP and "VR-compliant post-processing effects in Unity".
Preview Window#
If you use check Enable Preview Window on the MVRManager, a new window will be created so you can preview and debug your application with the real system configuration.
The window will be exactly the same as the one created when the application is exported, but you can modify parameters right in the Unity Editor, which is great for debugging.
The preview window is compatible with multi-display, stereoscopy and also cluster rendering, see Editor Cluster Debug.
Note: Make sure Unity's Game view is always visible, otherwise the rendering will be frozen and you will not to restart Unity.
Under the hood, the MVRManager will simply force the Window Mode of the current configuration to Compositor.
Exporting to a standalone player#
Typically there is nothing special to setup for exporting because MiddleVR modifies Player Settings to match its requirements.
Upgrading the MiddleVR package#
Starting with MiddleVR 2.1, the use of Unity's Package Manager is mandatory.
To upgrade the MiddleVR package from 2.1 to a more recent version, you must remove the existing package and add the new one.
Troubleshooting#
Player settings#
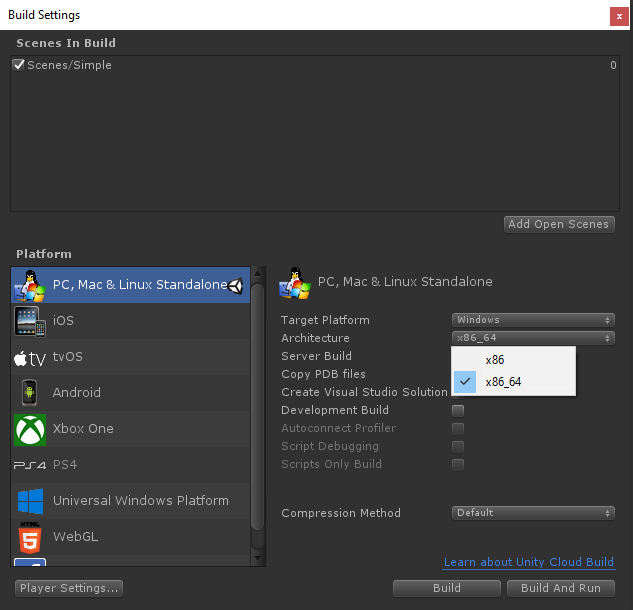
You must export 64-bit (x86_64):
Before exporting your application as a standalone player, you also have to make sure Unity is correctly configured to not get in the way of MiddleVR.
Go in the player settings (Edit > Project Settings > Player) and
make sure the following parameters match the screenshot:
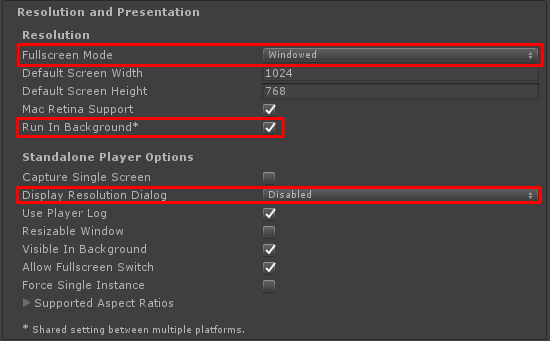
The "Default is Full Screen" option will make sure that Unity does not override MiddleVR's window configuration.
The "Display Resolution Dialog" option will also make sure that Unity does not override MiddleVR's window configuration. This is especially important in cluster mode: you probably don't want to close the resolution dialog on each cluster node each time you run your application.
The "Player Log" might slow down the cluster if a slave is trying to write its log through the network.
You also need to make sure that the "Auto Graphics API for Windows" is checked, or that if it is unchecked, you are using either Direct3D 11 or Direct3D 12.
OpenGL Core is not supported.


Additional parameters for active stereo (Frame Sequential - OpenGL Quad-Buffer)#
If you're running in active stereo (OpenGL Quad-Buffer), you should also have the vertical synchronization (VSync) de-activated in the menu Edit > Project Settings > Quality.
When importing the MiddleVR.unitypackage, VSync is automatically disabled for all Qualities(Fast, Simple, Good, Beautiful, Fantastic...).
MiddleVR will internally handle the VSync.
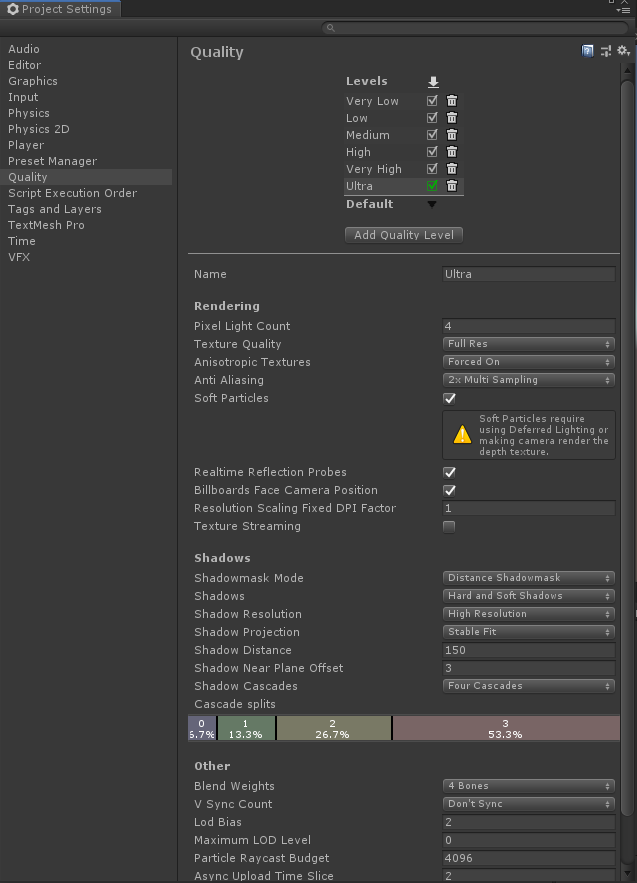
Note: Make sure that the Quality line selected (above in blue) is the one you want to use with MiddleVR. It seems Unity will use this selection as the default quality setting for the player.
Running your application as a standalone application#
Please see section Execution.