Create a simple multi-display configuration
Create a simple multi-display configuration#
In this tutorial you will learn:
- How to create a simple multi-display MiddleVR configuration
- Use the MiddleVR package in Unity
Requirements#
- None
Creating a multi-display configuration#
- Open MiddleVR Config
- Create a new configuration
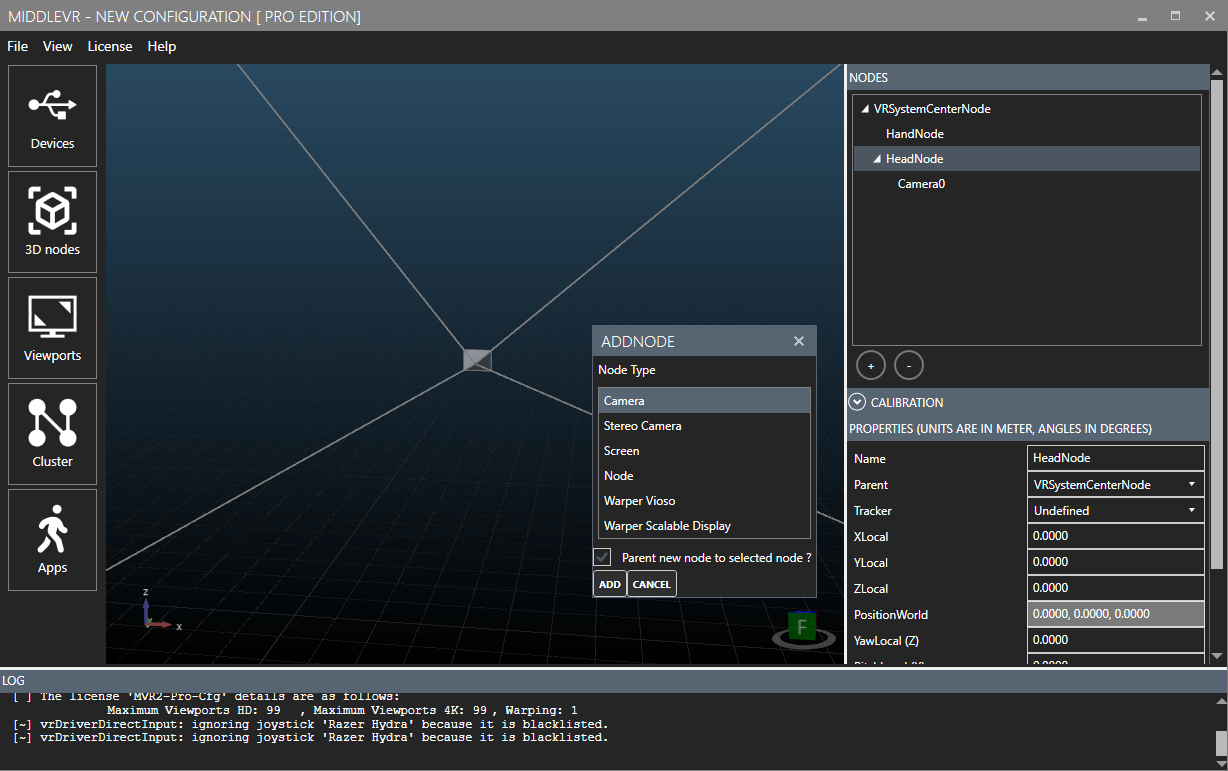
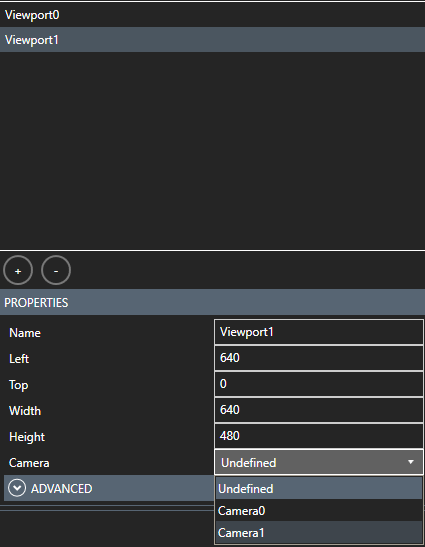
- Add a new camera:
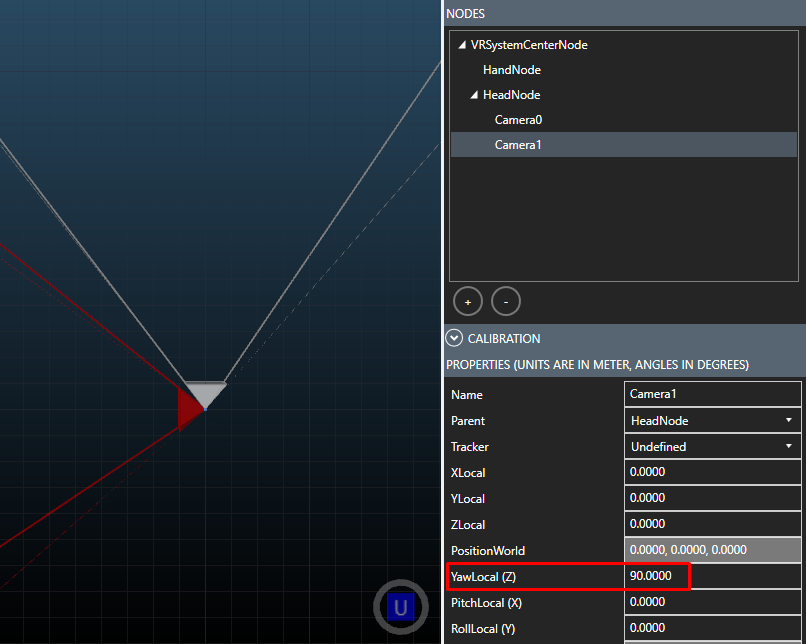
- Rotate it by 90° by setting YawLocal to 90
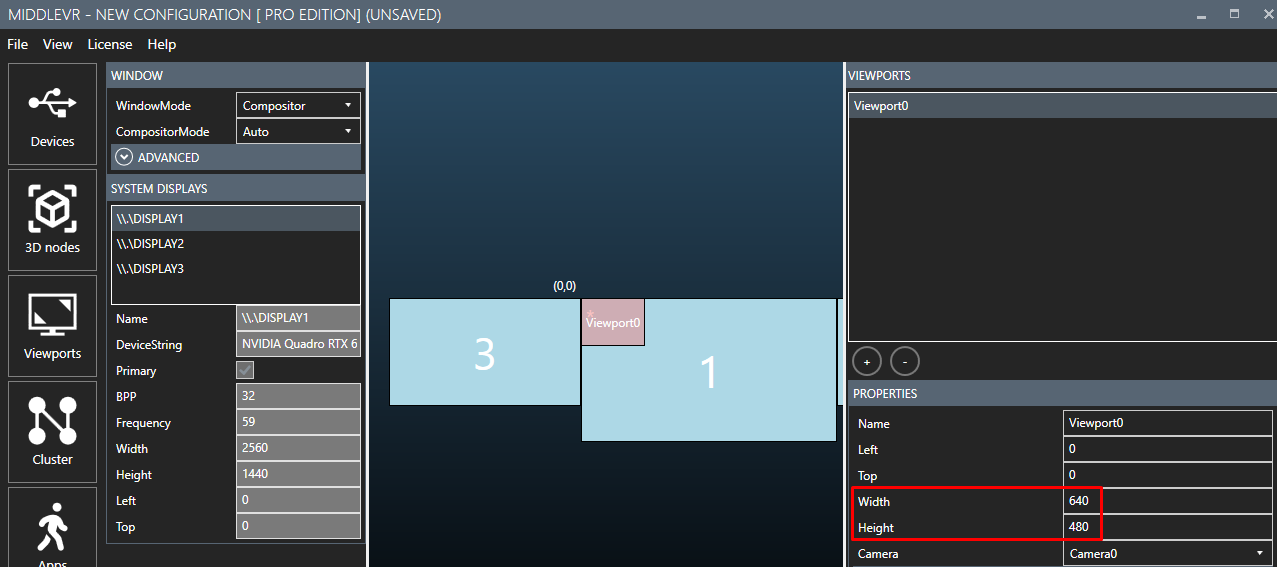
- Change the size of Viewport0 to 640x480:
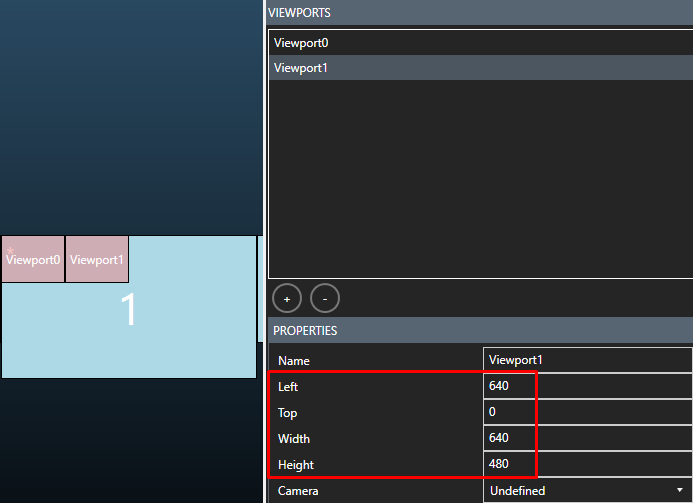
- Add a new viewport and set Left to 460, and the size to 640x480:
- Assign Camera1 to Viewport1:
-
Save the configuration file anywhere
-
Go in Apps. Your new configuration should automatically be added in the Configurations list.
-
If you followed the "Run the demo" tutorial, you should already have Demo_Outpost.exe added in the Apps list.
-
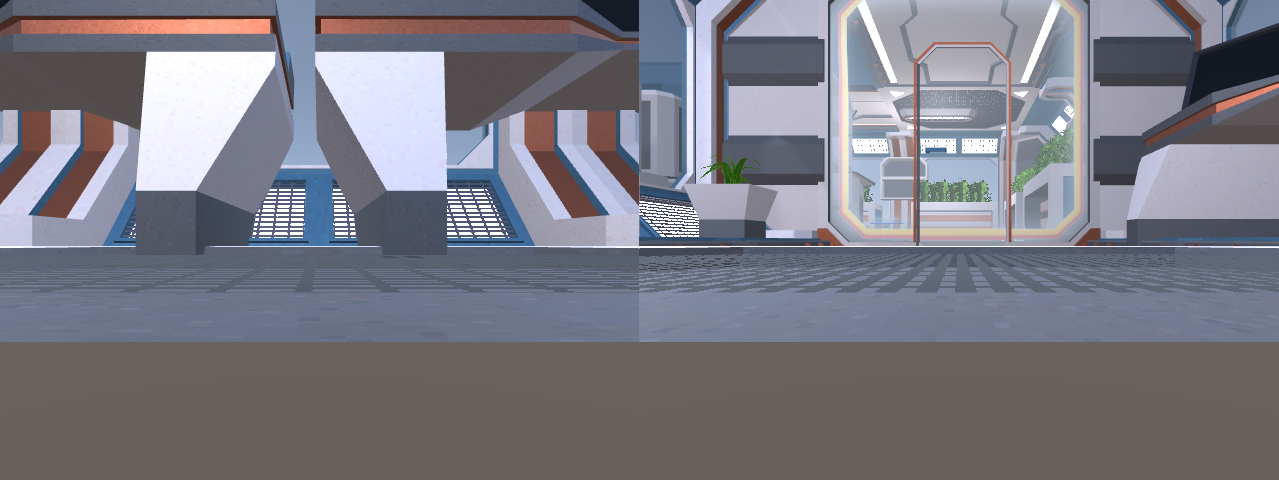
Make sure Demo_Outpost and your configuration are correctly selected and press "Run":
Testing in Unity#
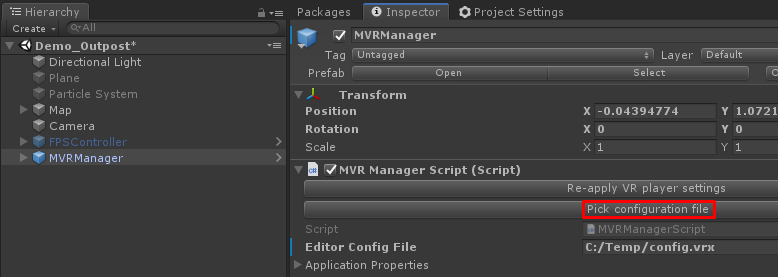
Start by importing the MiddleVR Unity package in your Unity project as seen in a previous tutorial.
Then pick your configuration file by clicking on "Pick Configuration File" on the MVRManager Editor:
Enable "Preview Window" on the MVRManager and Press Play!
A new window should appear:
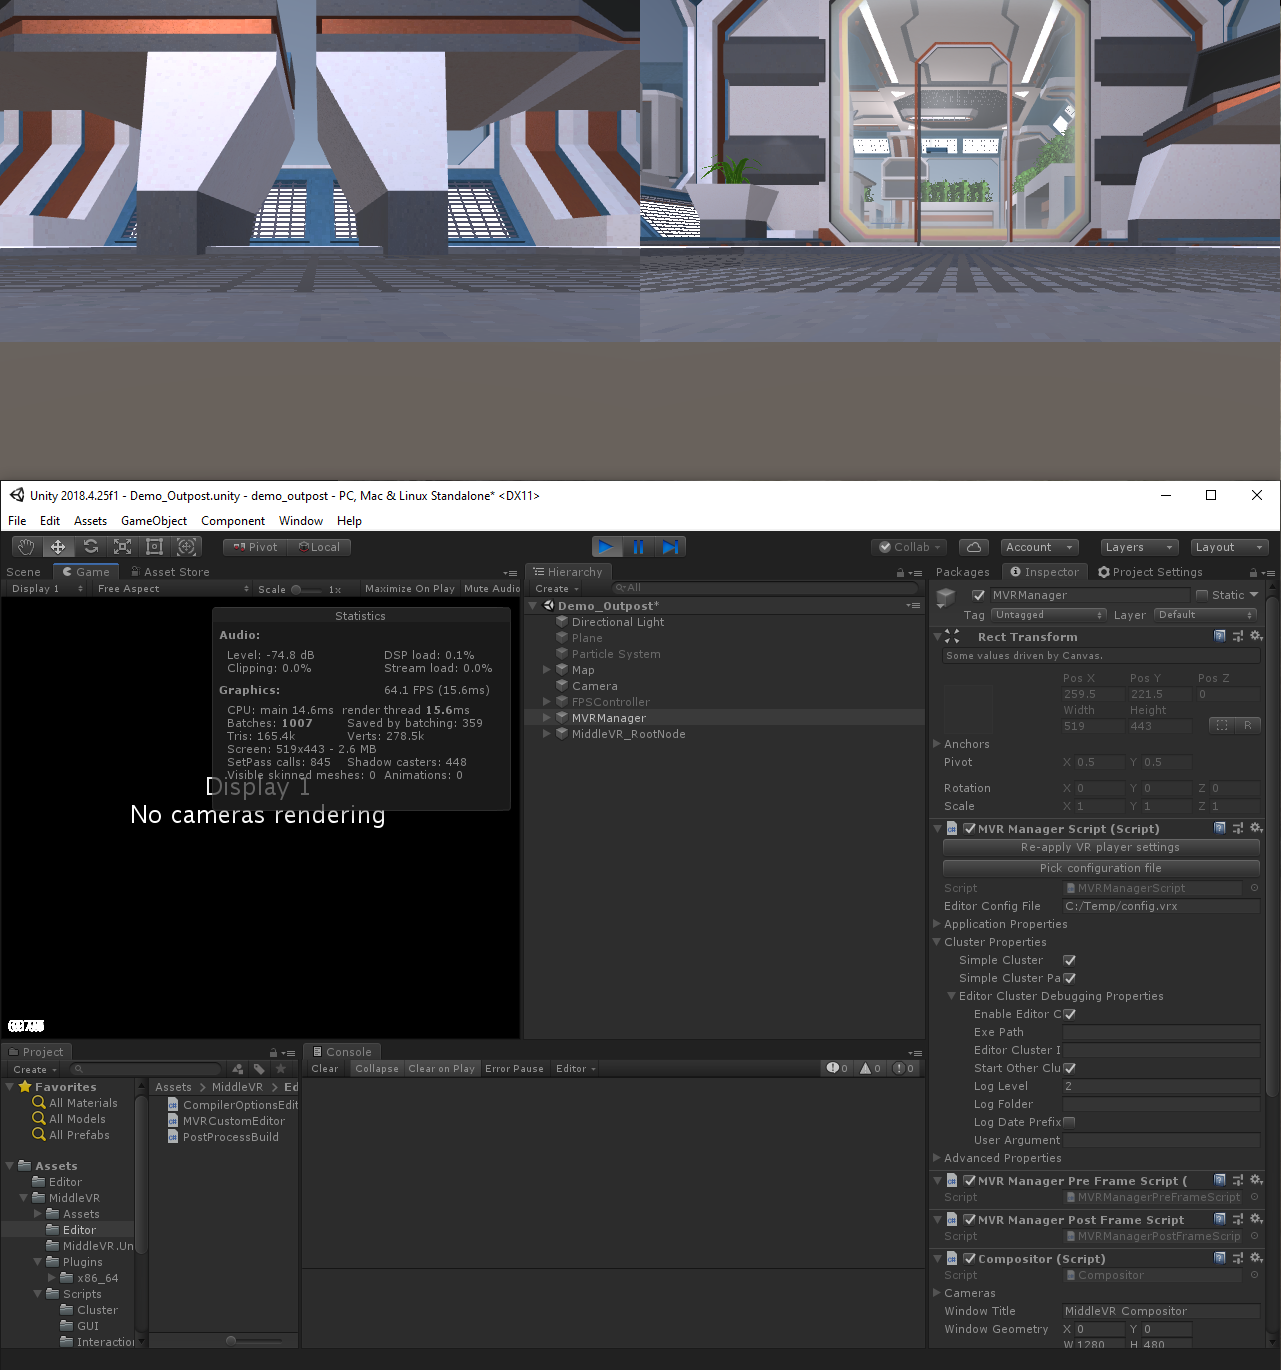
You can exit by pressing Esc or pressing stop in Unity.
Have fun!#
Now you can go back in the configuration tool and add cameras, change the viewports layout. Save the configuration and simply press play again in Unity. MiddleVR will automatically reconfigure your application to match your configuration.