Create a simple configuration with a tracker
Create a simple configuration#
In this tutorial you will learn:
- How to create a simple MiddleVR configuration
- How to simulate a 3D tracker with the mouse
- How to move a camera with a tracker
- Use the MiddleVR package in Unity
Requirements#
- A mouse with three buttons
Creating a mouse-simulated 3D tracker#
We will start by creating a fake 3D tracker. This 3D tracker will be simulated by a mouse with three buttons. Later you will be able to replace this fake 3D tracker with an actual 3D tracker.
We will then specify that this 3D simulated tracker, representing a position and orientation in space, will move a 3D camera.
To create this mouse-simulated tracker, go into the Devices window,
press the '+' button to add a device, and select the "Tracker
Simulator - Mouse" device in the 3D Trackers section.
![]()
Moving the simulated tracker
As specified in the Help section of the Mouse Tracker Simulator, the virtual tracker is moved by pressing the middle mouse button.
If you go forward or backward, you're moving the tracker forward or
backward. You will see the Y value of the tracker increase or decrease.
If you move the mouse left or right you will rotate the tracker left or
right. You will see the Yaw value change accordingly.
You can reset its values by pressing both the left and right button at the same time.
Moving the camera with the 3D tracker#
Then go to the 3D nodes window. There you can see that a predefined system description has been created:
![]()
To specify that you want to animate the HeadNode with the fake
tracker, simply click on the HeadNode in the hierarchy to display its
properties. In the Tracker property select the MouseTracker.
This simply assigns the MouseTracker to this 3D node. Now the
HeadNode will follow the 3D tracker!
Try moving the HeadNode by pressing the middle button of your mouse,
or Ctrl on your keyboard, and moving it.
You can translate up, down, left and right by adding the Alt key.
Note: You can reset the mouse tracker values by pressing both left and right mouse buttons at the same time.
Save the configuration file and make sure you remember the full path.
Testing in Unity#
Start by importing the MiddleVR Unity package in your Unity project as seen in a previous tutorial.
Then specify the full path to the configuration file you've created:
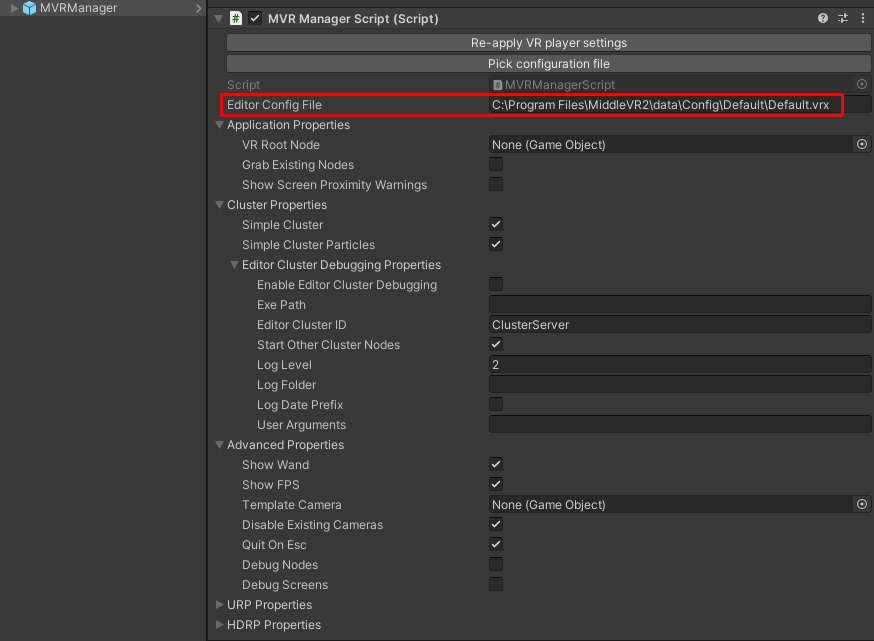
Press Play!
You will notice that the hierarchy that was described in your configuration is automatically re-created in Unity:

You should be able to move the camera around by pressing the middle button of your mouse.
Note: If the viewport you have defined in MiddleVR and the viewport in the Unity editor don't have the same aspect ratio, the view will appear distorted. As soon as you run your application with the standalone player the view will have the right aspect ratio.
Note: The TrackerSimulatorMouse might get stuck if you're using the "Maximize on Play" option from Unity's game viewport.
Have fun!#
Now you can go back in the configuration tool and modify the hierarchy, add cameras, change the viewports layout. Save this description and simply press play again in Unity. MiddleVR will automatically reconfigure your application to match your configuration.