Configure Trackers
Configuring a tracking system#
Introduction#
Make sure to read the article "Trackers".
VR system origin#
The difficult part of understanding the configuration of a tracking system is understanding how the data from the tracker are related to the real world.
Position
The first thing to decide is where, in the real world, are want to set the origin of your VR system. This is an arbitrary point in space that has (0,0,0) as coordinates.
This could be a point on the floor of your CAVE, the center of the 3DTV, a point on your desk, or any point in space.
"Default" origin
If you are using only one tracking system, it is often easier to just use the default origin of the trackers. For example for the Kinect, the origin is the position of the 0. If a user is standing exactly on the Kinect, its position will be zero. For a Razer Hydra, the origin is the base. If the Hydra trackers could come exactly inside the base, their position would be exactly (0,0,0).
For any given tracking system, there is a position in space where the tracker will report (0,0,0).
You can decide to keep this point in space as the origin of your VR system, or decide to set the origin somewhere else because it is more convenient.
Neutral orientation
You also have to decide what will be the "neutral orientation", that is an arbitrary rotation in space where Yaw=Pitch=Roll = 0.
It is often easier to think about your "neutral orientation" in terms of the Front, Right and Up vectors (represented in MiddleVR respectively as +Y, +X, +Z ).
The Up vector is generally easy to set, it’s the opposite of the gravity.
But the Front and Right vectors can be arbitrarily set. There is usually a natural orientation and it shouldn’t be hard to decide on one.
Just make sure to be consistent during the whole configuration process.
"Default" orientation
As for the position, there is a default orientation inherent to your tracking system. You can decide to keep this neutral orientation as the neutral orientation of your VR system, or decide to change it because it is more convenient.
Moving the origin of a tracker#
There are two reasons why you might want to modify the origin of a tracker:
- because it is more convenient to have the origin at another place,
- you are using multiple trackers with different inner origins. Moving the origins of each tracker to one common origin will ensure coherent and homogeneous tracking data among all the devices.
There are two ways to modify the origin of a tracker:
- move or reconfigure the tracker itself,
- use MiddleVR 3D nodes
Using MiddleVR 3D nodes to move the origin of a tracker
MiddleVR offers a quick and easy way to move the origin of a tracker.
You simply have to create a 3D node that will represent the origin of your tracker, and place it with respect to the origin of your VR system.
Then all objects that are tracked by this particular tracker should be represented as 3D nodes that are children from this origin.
Calibrating the tracker origin
You can either manually move the tracker origin, or use one of the calibration features of MiddleVR: "Calibrate Parent".
Suppose you are using a Razer Hydra. You could create the following hierarchy:
-
Center Node
-
HydraBase
-
HandNode
-
etc.
-
-
Now let’s say that your Hydra base is not placed at the origin of your VR system. For example you decided that the origin of your VR system is the middle of a table, and this is where all the interactions will happen. You then decide to put the Hydra base away so that it will not disturb the interactions. This means that if you move the hand tracker to the origin, the data reported by MiddleVR will not be (0,0,0), but the actual distance from the hand to the base.
The first option is to manually measure the distance between the Hydra base and the actual origin of the VR system and enter that manually as the coordinates of the HydraBase 3D node.
The other option is to position one of the Hydra tracker, for example the one that you assigned to the HandNode, at the origin of the VR system. You can then simply select "Calibrate Parent" in the "Calibration" options on top of the 3D nodes properties, and press "Calibrate". This will automatically move the HydraBase 3D node so that the position is (0,0,0). The effect is that now your HandNode is positioned at the origin and the position reported by MiddleVR for the HandNode is also (0,0,0).
Offset to the tracked object
Set Neutral Transformation / Position / Orientation
Adjusting the coordinate system#
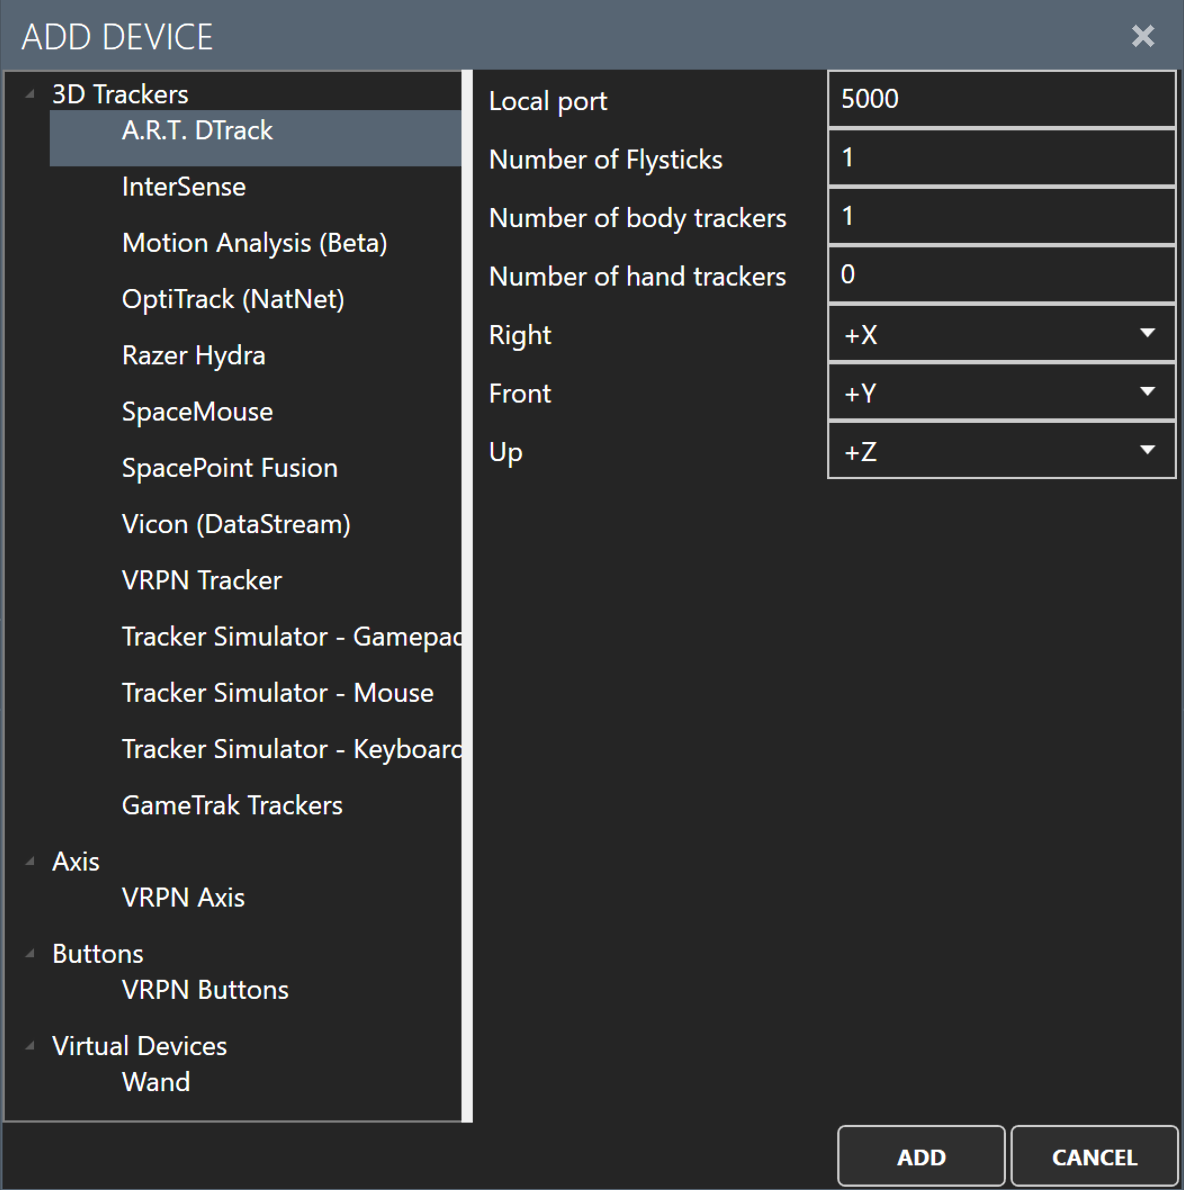
Some devices must be configured so that their axis match the definition above. For example: A.R.T DTrack or VRPN trackers.
The representation of 3D information in space is not standardized. Sometimes moving a tracker from the user to the screen can be seen as an increase of value on the Z axis, sometimes as a decrease of value on the Y axis. This is dependent on the way the device reports its data and how the driver interprets this data.
The drivers that require a specific coordinate system come usually with the "TrackerCoordinateSystem" property that it is needed to set up properly. For VRPN trackers, "TrackerCoordinateSystem" is replaced directly with Right/Front/Up.
One easy way to configure the axis of a device is first to add it without modifying the existing Right/Front/Up definition. Then go to the 3D nodes tab, assign the device to any node, for example the "HandNode".
Now try to move the 3D tracker to the right, to the front (going away from the user towards the screen), and upwards. If the 3D node moves correctly, you're lucky, your calibration is done.
If this is not the case, you will have to write down some information:
-
start by moving the 3D tracker to the right. By looking at the 3D node X,Y,Z, find out which one of these axis is moving by the largest amount. Most of the time when you're moving to the right, it's the X axis that is moving the most. Please also note if, when moving to the right, the axis is increasing or decreasing. For example, if the X axis is increasing, write down: Right: +X. If it's decreasing, write: Right: -X.
-
repeat this step for front (away from the user, towards the screen) and up.
You will end up with something like:
- Right: +X
- Front: +Z
- Up: -Y
Now remove the existing driver and recreate it by specifying the coordinate system with "TrackerCoordinateSystem" property.