Setup MiddleVR in Unity
Setup MiddleVR in Unity#
In this tutorial you will learn:
- How to add MiddleVR to your Unity project
- How to export your application
- How to run your application through MiddleVR configuration tool.
Requirements#
- A mouse with three buttons
Add MiddleVR to your Unity project#
Import the MiddleVR package#
-
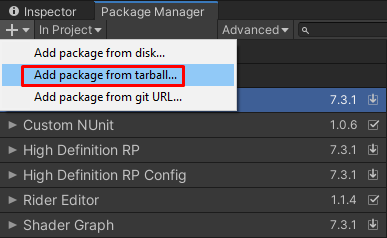
Open the Packet Manager: Click in
Window > Package Manager -
Click on
+and chooseAdd package from tarball...
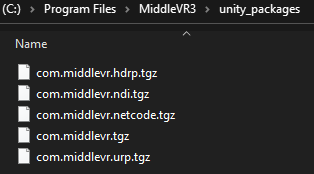
- Locate
C:\Program Files\MiddleVR3\unity_packages\com.middlevr.tgz:
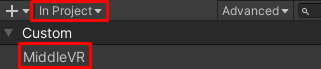
The package will then be imported and you can see that the plugin
is correctly installed if you click in In Project:
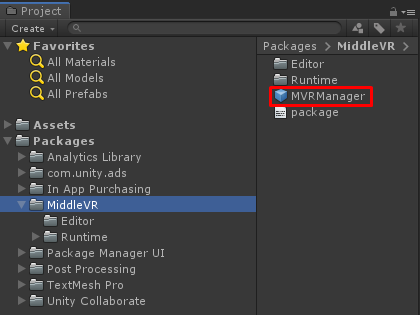
Add the MVRManager to your scene#
Open the Packages\MiddleVR folder in the Project tab and
drag and drop the MVRManager prefab to the Hierarchy tab of your
project:
The MVRManager has several options:
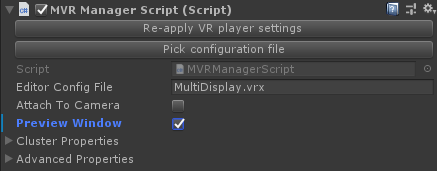
If your goal is to create a multi-display app without any kind of 3D head tracking,
you can enable Attach To Camera which will parent the MVRManager to your existing
camera. In that case any navigation that you have will be correctly applied to MiddleVR
cameras.
Note for VR users: In case you are using head tracking, be aware that MiddleVR camera will be offset from the
MVRManager by the tracking position. For example if your existing camera is already at 1.75m
from the floor to simulate a user's height, and the tracking information also reports that
the physical user's head height is at 1.75, the MiddleVR camera will be at 1.75m + 1.75m = 3.5m!
In that case you can either set your existing camera at floor level, or disable Attach To Camera
and navigate the MVRManager instead.
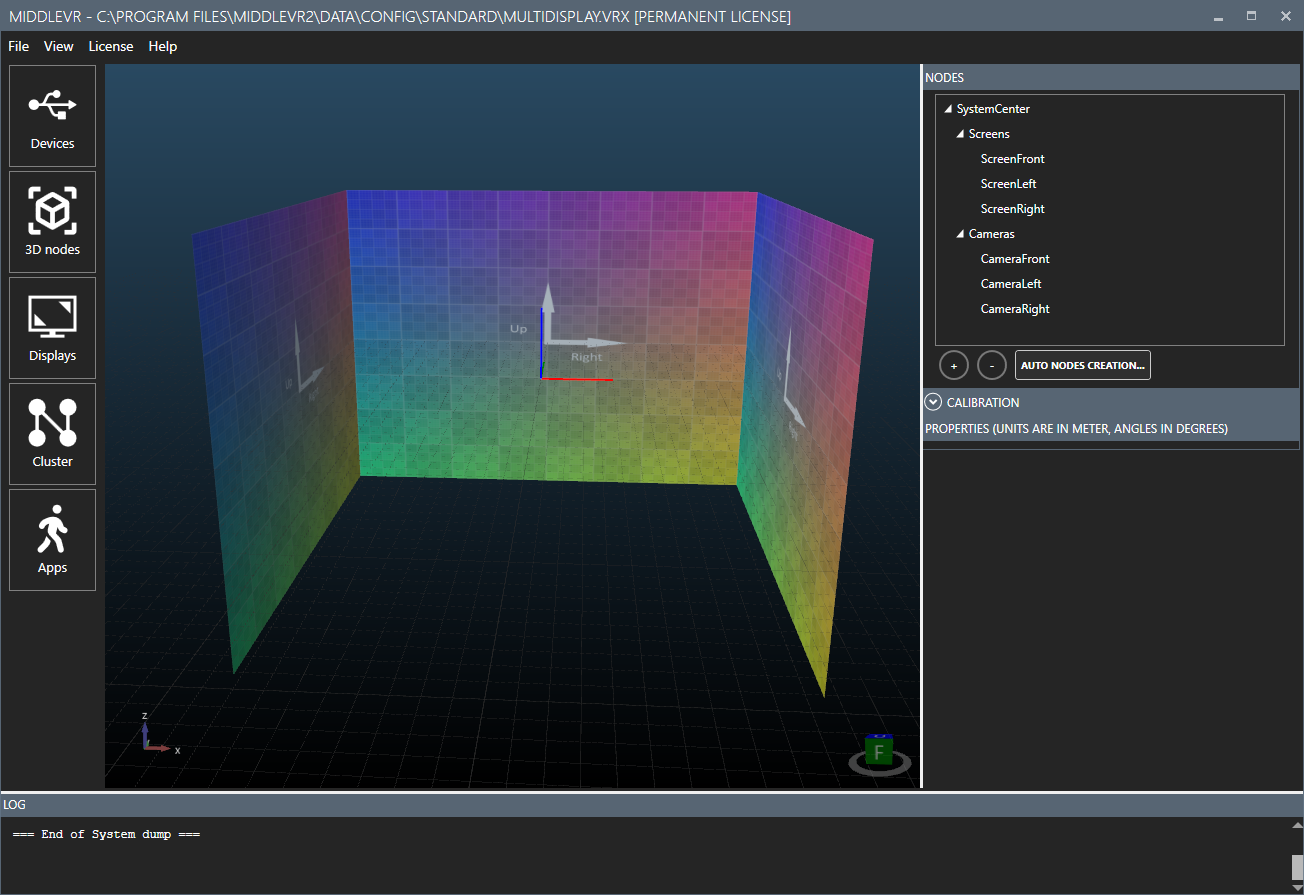
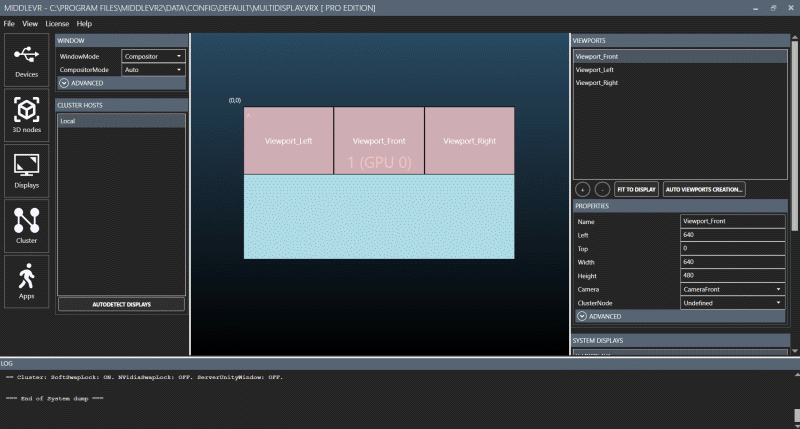
Editor Config File#
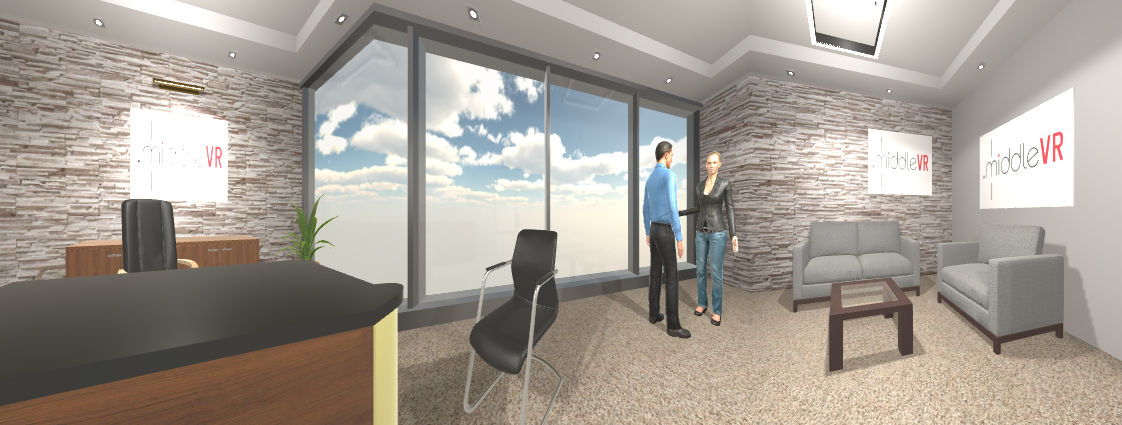
A MiddleVR configuration file describes your graphics system: position/size of the screens, tracking system, layout of the viewports, cluster nodes...
The default Editor Config File file is MultiDisplay.vrx. It corresponds to a simple three big screens setup
with three cameras using one computer:
Play#
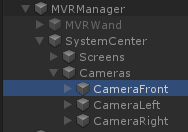
When pressing the play button, the MVRManager will create all the cameras and viewports based on the configuration file:
Navigate in the scene#
You can now navigate in the scene with your mouse:
- Press Shift and the middle mouse button and move forward, then left/right.
- Pressing Shift+Alt will allow you to go up or down and sidestep.
Preview window#
If you enable "Preview Window" and press Play, a new window will popup with exactly the same position/size and capabilities as if you had exported your application. This means you can output to your virtual stage for example.
Note to VR users: It means you can also use active stereoscopy for example.
Cluster#
If your application will run on a multi-computer cluster setup, make sure to adapt your application for cluster.
Multi-GPU#
If your application will run on a multi-computer cluster setup, make sure to adapt your application for cluster because MiddleVR will run one Unity instance per GPU, simulating a cluster node on each GPU.
Export your application#
In Unity, open the menu File > Build Settings....
Make sure x86_64 is selected. MiddleVR is only compatible with 64-bit builds:

Make sure that the Platform is PC, Mac & Linux Standalone, and
Target Platform is Windows.
Press Build and choose a location for your application.
Run your application#
Note: If you downloaded the MiddleVR package through the asset store you need to download and install the full MiddleVR installer on our website to get access to MiddleVR Config and all the other predefined configurations: https://www.middlevr.com/
There are two ways to run your application:
-
Run the
.exefile through MiddleVR configurator as described here: this allows you to select the system configuration you want to use at runtime without modifying the application. -
Manually execute the
.exefile that was created and specify a configuration file on the command line with--config <path_to_vrx>. You can look at the command line that MiddleVR Config generates in the Custom and Debug arguments section.
