MiddleVR setup guide#
A note to system administrators#
Here is a quick note to our sysadmin friends to help them with MiddleVR: A note to system administrators
Overview#
This is a complete guide to setup MiddleVR in your graphics system.
The process of setting up a system with MiddleVR is roughly the following:
-
Prepare all cluster nodes:
- Setup NVidia drivers
- Install MiddleVR on all cluster nodes. This will install the MiddleVR Daemon (which receives commands drom the cluster server) and automatically open required firewall ports
-
Setup your tracking hardware
-
Create a MiddleVR configuration
- Configure 3D nodes: Screens, Head node, Hand node, Cameras
- Configure cluster
- Configure viewports
- Configure tracking
-
Make sure your applications and configurations are accessible by all cluster nodes
- Either by copying them on each cluster node
- Or creating a shared folder connected on a network drive
-
Test the system
If your system is not using a cluster or stereoscopy, simply ignore those parts.
Knowledge base#
Our knowledge base (registration required) contains useful information gathered from our extensive experience with cluster setups:
Prepare all cluster nodes#
Setup NVidia drivers#
On all cluster nodes:
-
Be aware of Windows Scale
-
Make sure to install a recommended NVidia drivers version
-
Setup Mosaic & Genlock as required by your system. See Calibration app on how to validate Genlock
-
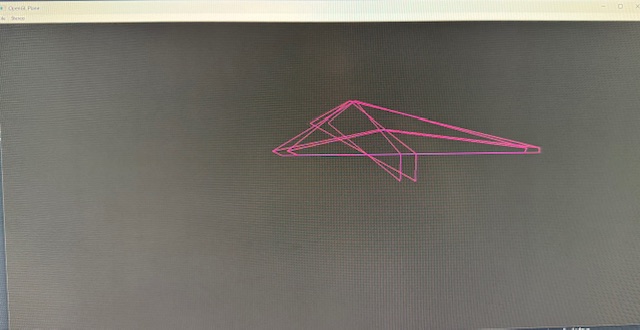
Setup active/quad-buffer stereoscopy if needed. You can use a simple OpenGL tool that does not use MiddleVR to validate that stereoscopy has been enabled:
C:\Program Files\MiddleVR3\Tools\oglplane.exe. If active stereoscopy is not enabled, the tool will complain. You should see a stereoscopic wireframe paperplane.
-
If you are happy with the NVidia driver settings, you can Save them.
Create a shared network folder#
You need to make sure that your applications and configurations are accessible by all cluster nodes. Each node must use exactly the same configuration and version of the application.
-
When the shared folder is created, you have to map/connect it on every cluster node. You can use the Connect Network Drive feature of MiddleVR config or connect it manually.
Best practices:
- Create the following folders:
Apps: To put all your appsCfg: To put your MiddleVR configurationsLogs: Where the MiddleVR/Unity logs will be storedShare: Put useful tools that can help you setup/maintain the cave. For example store the MiddleVR installer.
Install MiddleVR#
-
Download the latest MiddleVR version from our website (registration required). The validation of your account is manual so make sure to anticipate this step.
-
Optional: Download MiddleVR demos
-
Install MiddleVR on all machines:
Silent install#
If you are a system administrator and want to run a silent install, possibly remotely, see Silent install
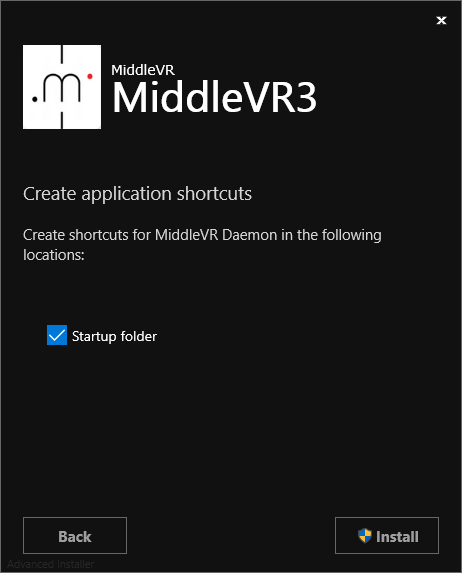
Interactive install#
At the end of the setup, make sure that "Startup folder" is checked. This will make sure the MiddleVR Daemon is automatically run at startup of windows.
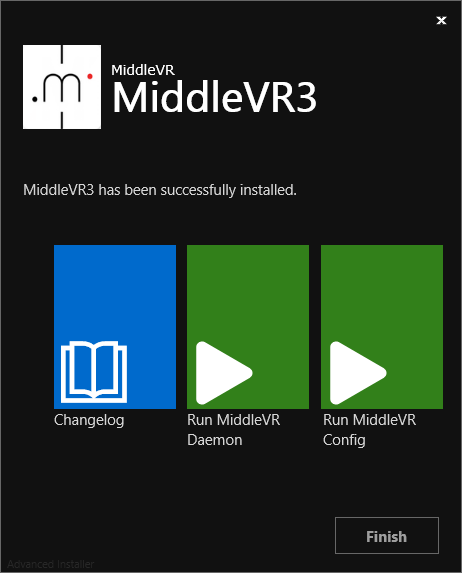
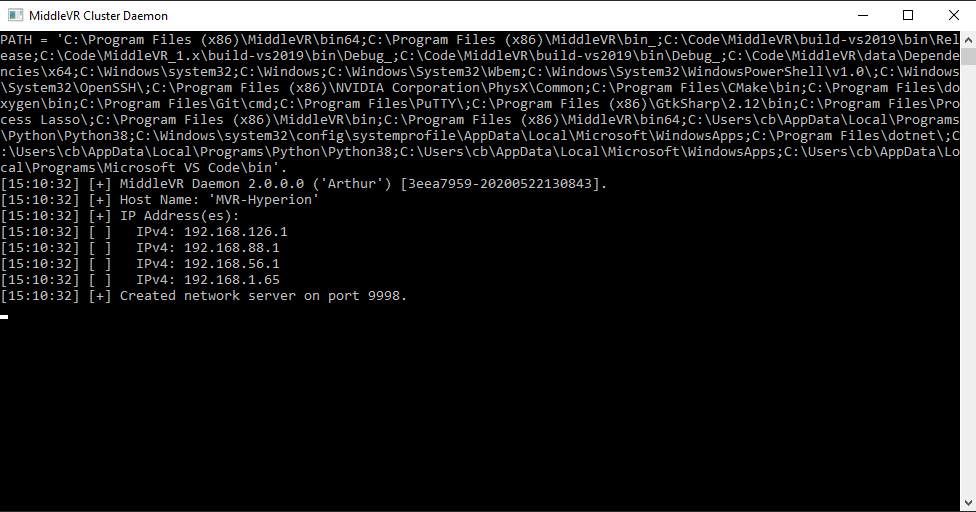
Clicking on "Run Daemon" will start MiddleVR Daemon.
More info:
- MiddleVR firewall ports are automatically opened by the installer
- Devices firewall ports like ART Dtrack, Optitrack, Vicon, VRPN and others are not automatically opened by the installer
- Unity netcode firewall ports are not automatically opened by the installer
Setup your tracking hardware#
-
Make a note of where the center/zero of your tracking system is.
-
We will setup the tracking in MiddleVR later.
Create the MiddleVR configuration#
License#
-
Start MiddleVR config on the Cluster server
-
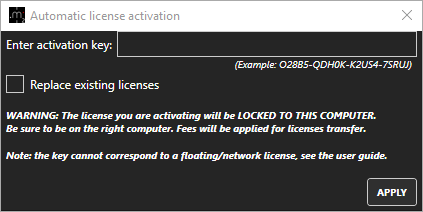
Make sure the Cluster server has the correct license. Only the server requires a license. See Installing a license
Note: Make sure to activate the license on the computer that will be using the license. Any license that is not activated on the right computer will require a new license fee.
Note: Clients don't need to have any license
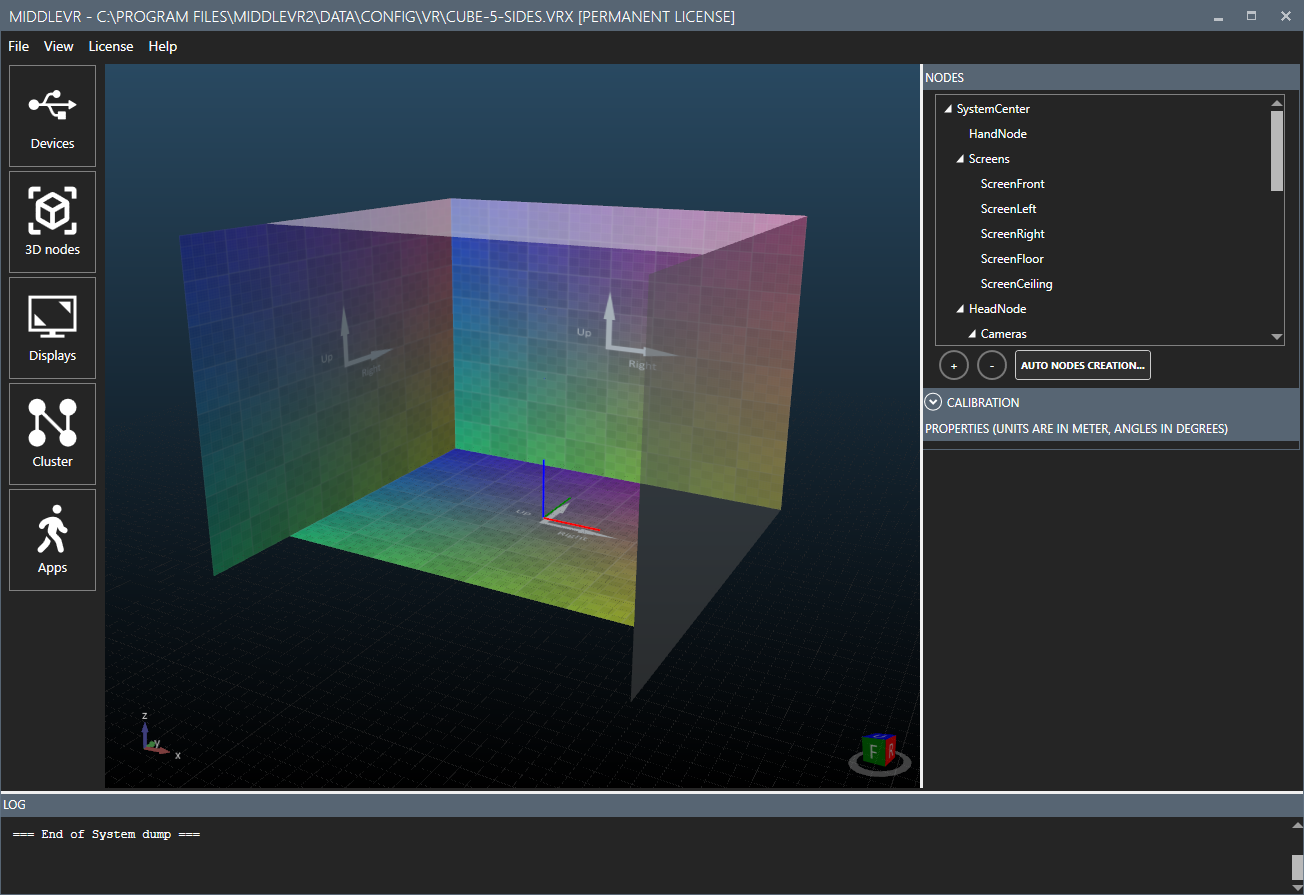
3D nodes#
-
In MiddleVR Config, go to the 3D nodes tab.
-
Start from a clean configuration or from one of the templates.
-
Make sure to save your configuration to the Shared network folder, for example on
Z:\cfg
-
Remember where the center/zero of your tracking is and make sure to setup the Screens relative to this center.
-
If you are using warping, make sure to read the Warping documentation.
-
Using
Auto nodes creationyou can easily create one stereo camera per screen.
Best practices:
- If your system involves a user whose head is tracked, it should have a
HeadNoderepresenting the head of the user - Parent all cameras to
HeadNode. - During the setup phase, set the height of the
HeadNodeto be 1.7 so that when testing later you have a correct viewpoint. Later we will apply a 3D tracker to theHeadNode. - It should also have a
HandNoderepresenting its hand. - The Wand, which allows users to interact, will be automatically attached to the
HandNode.
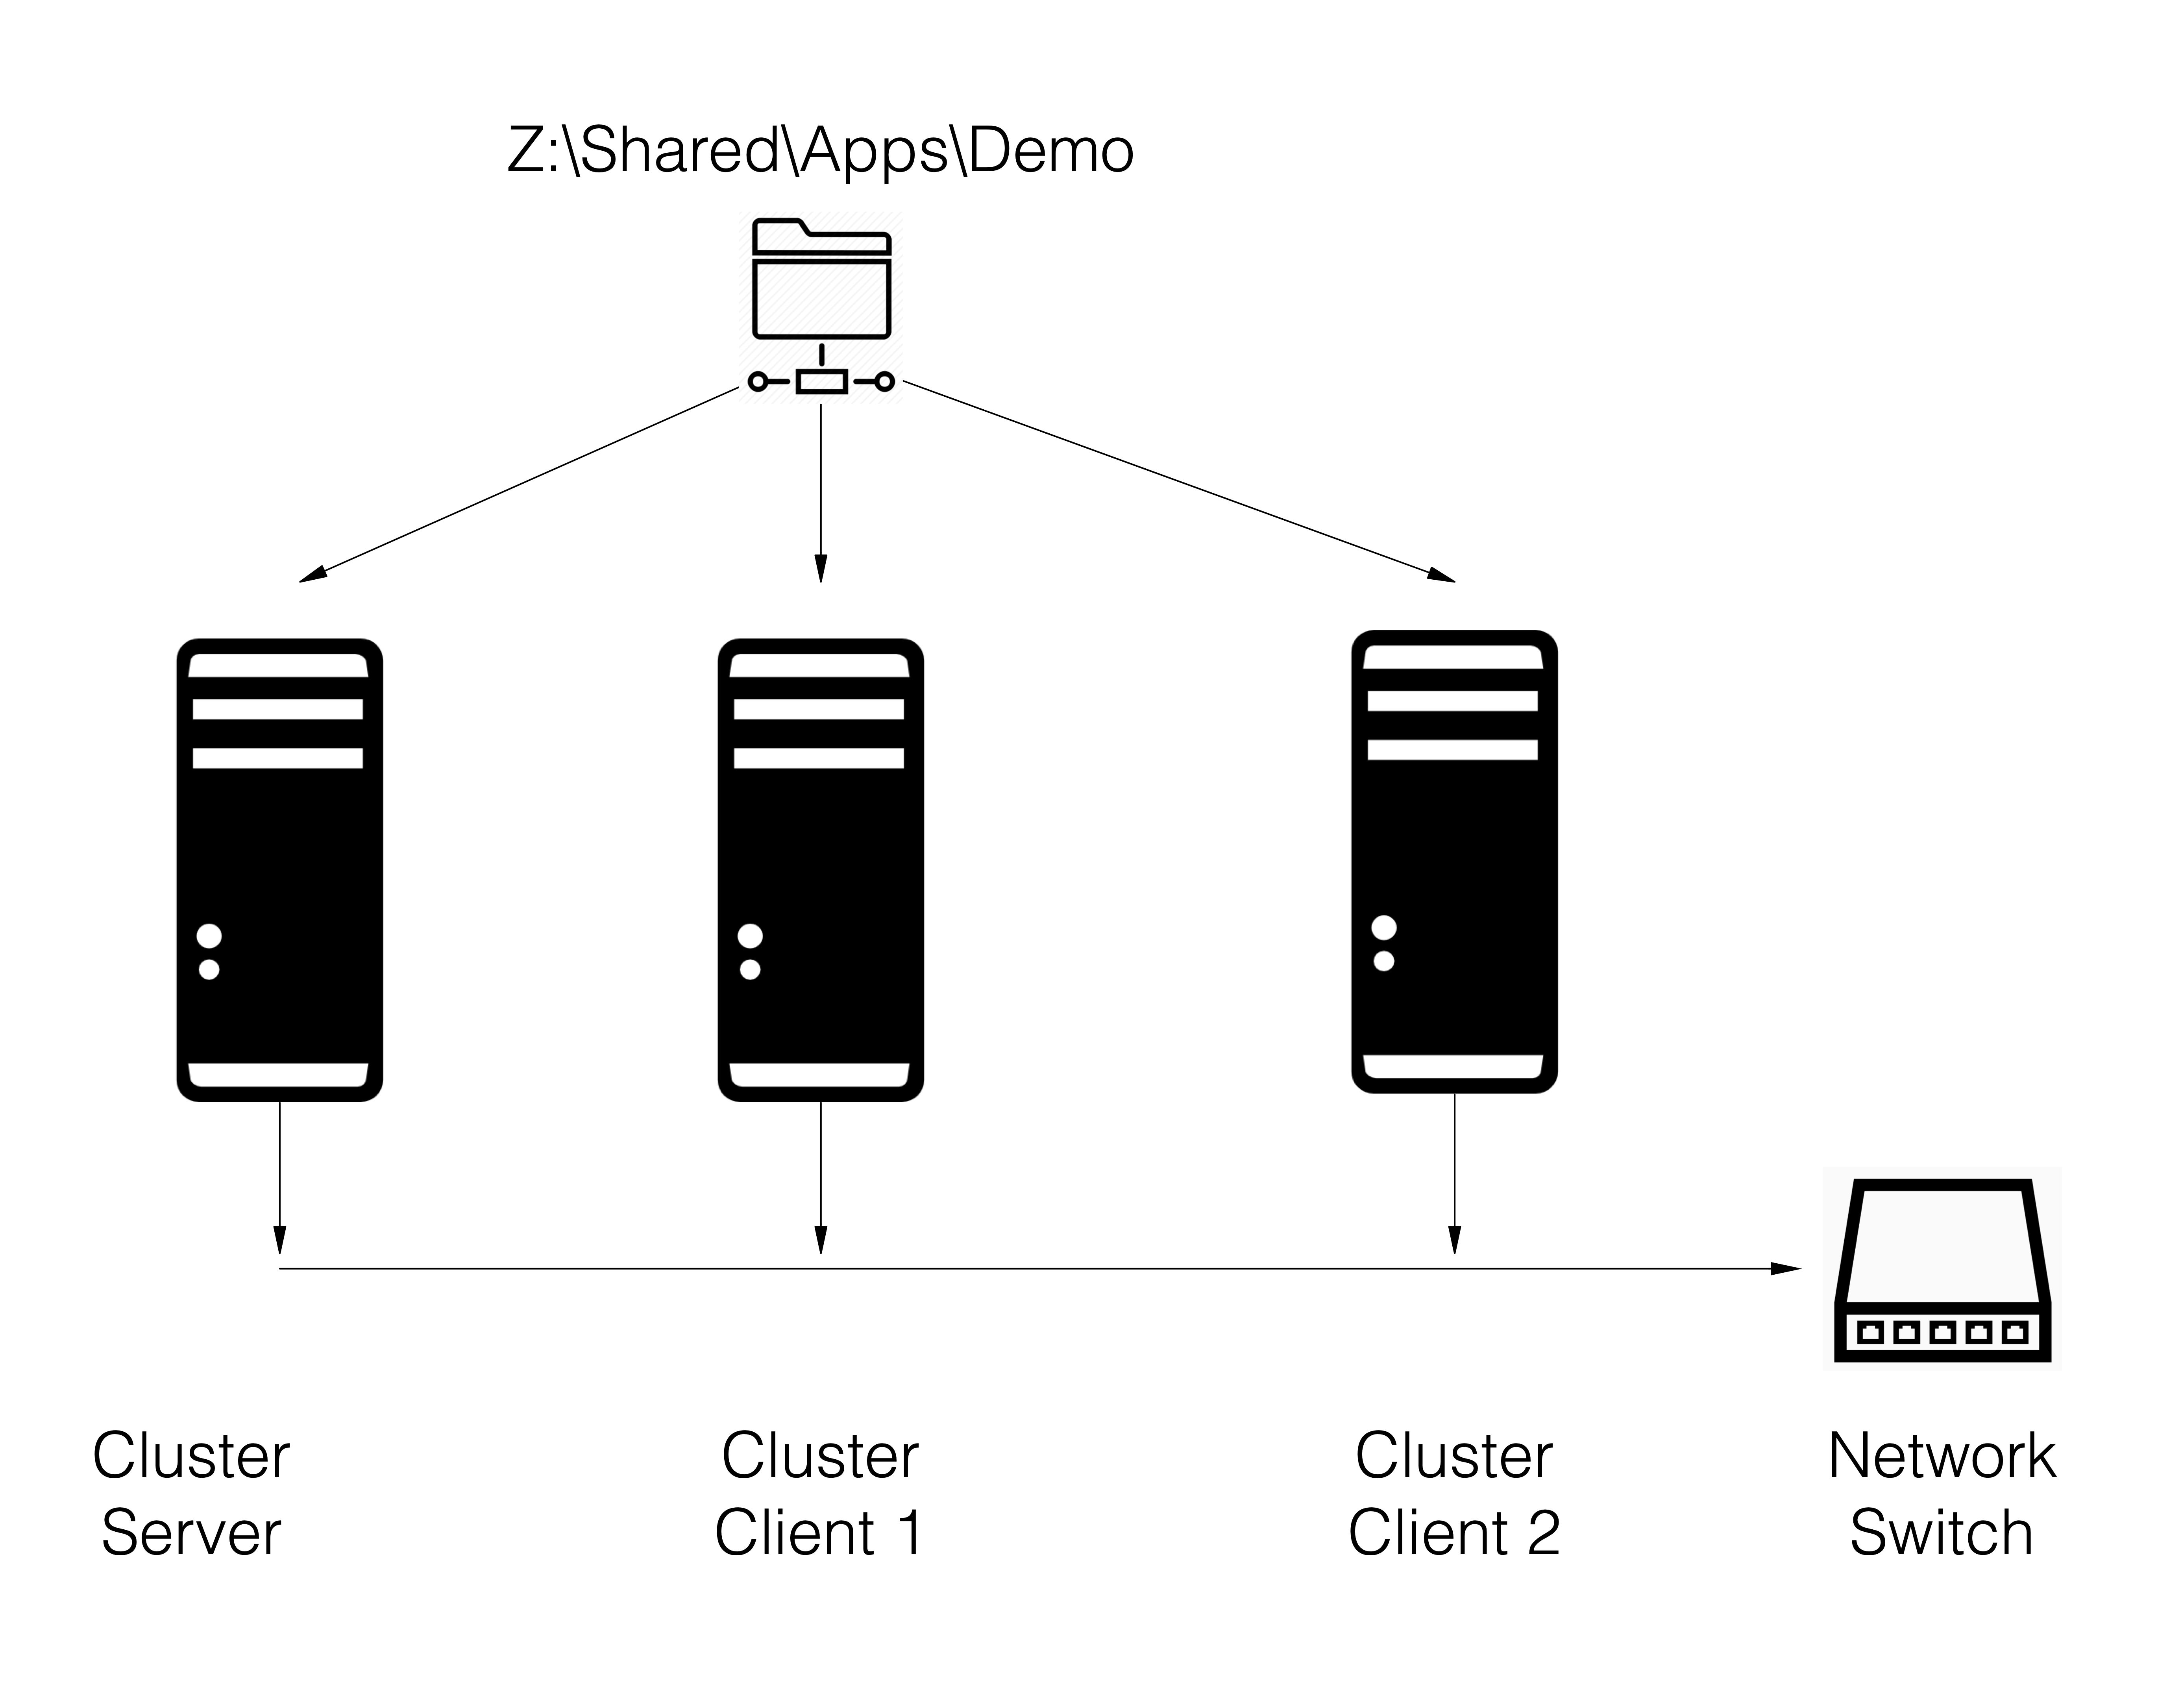
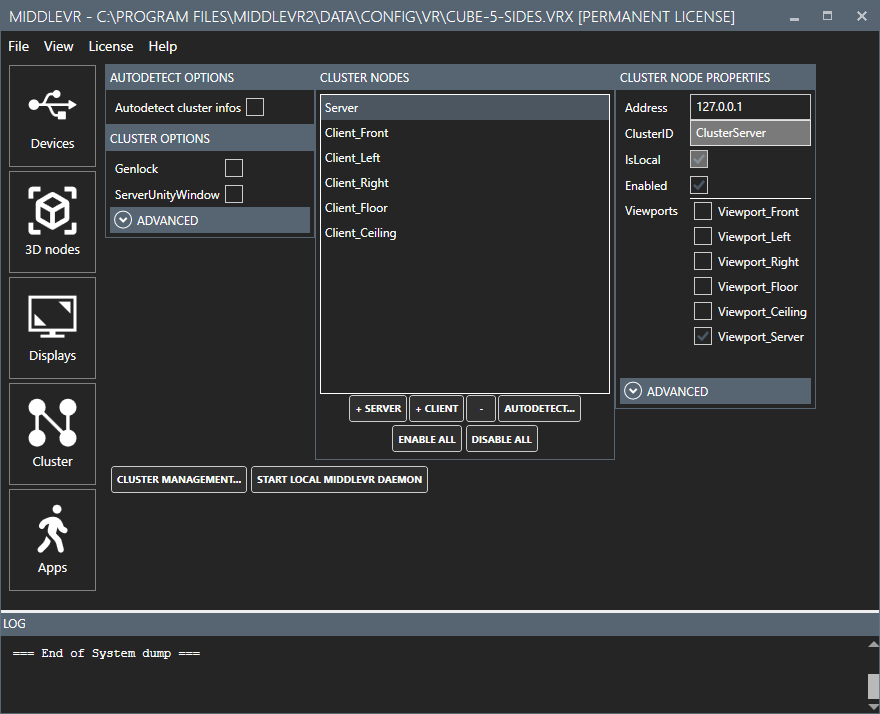
Cluster#
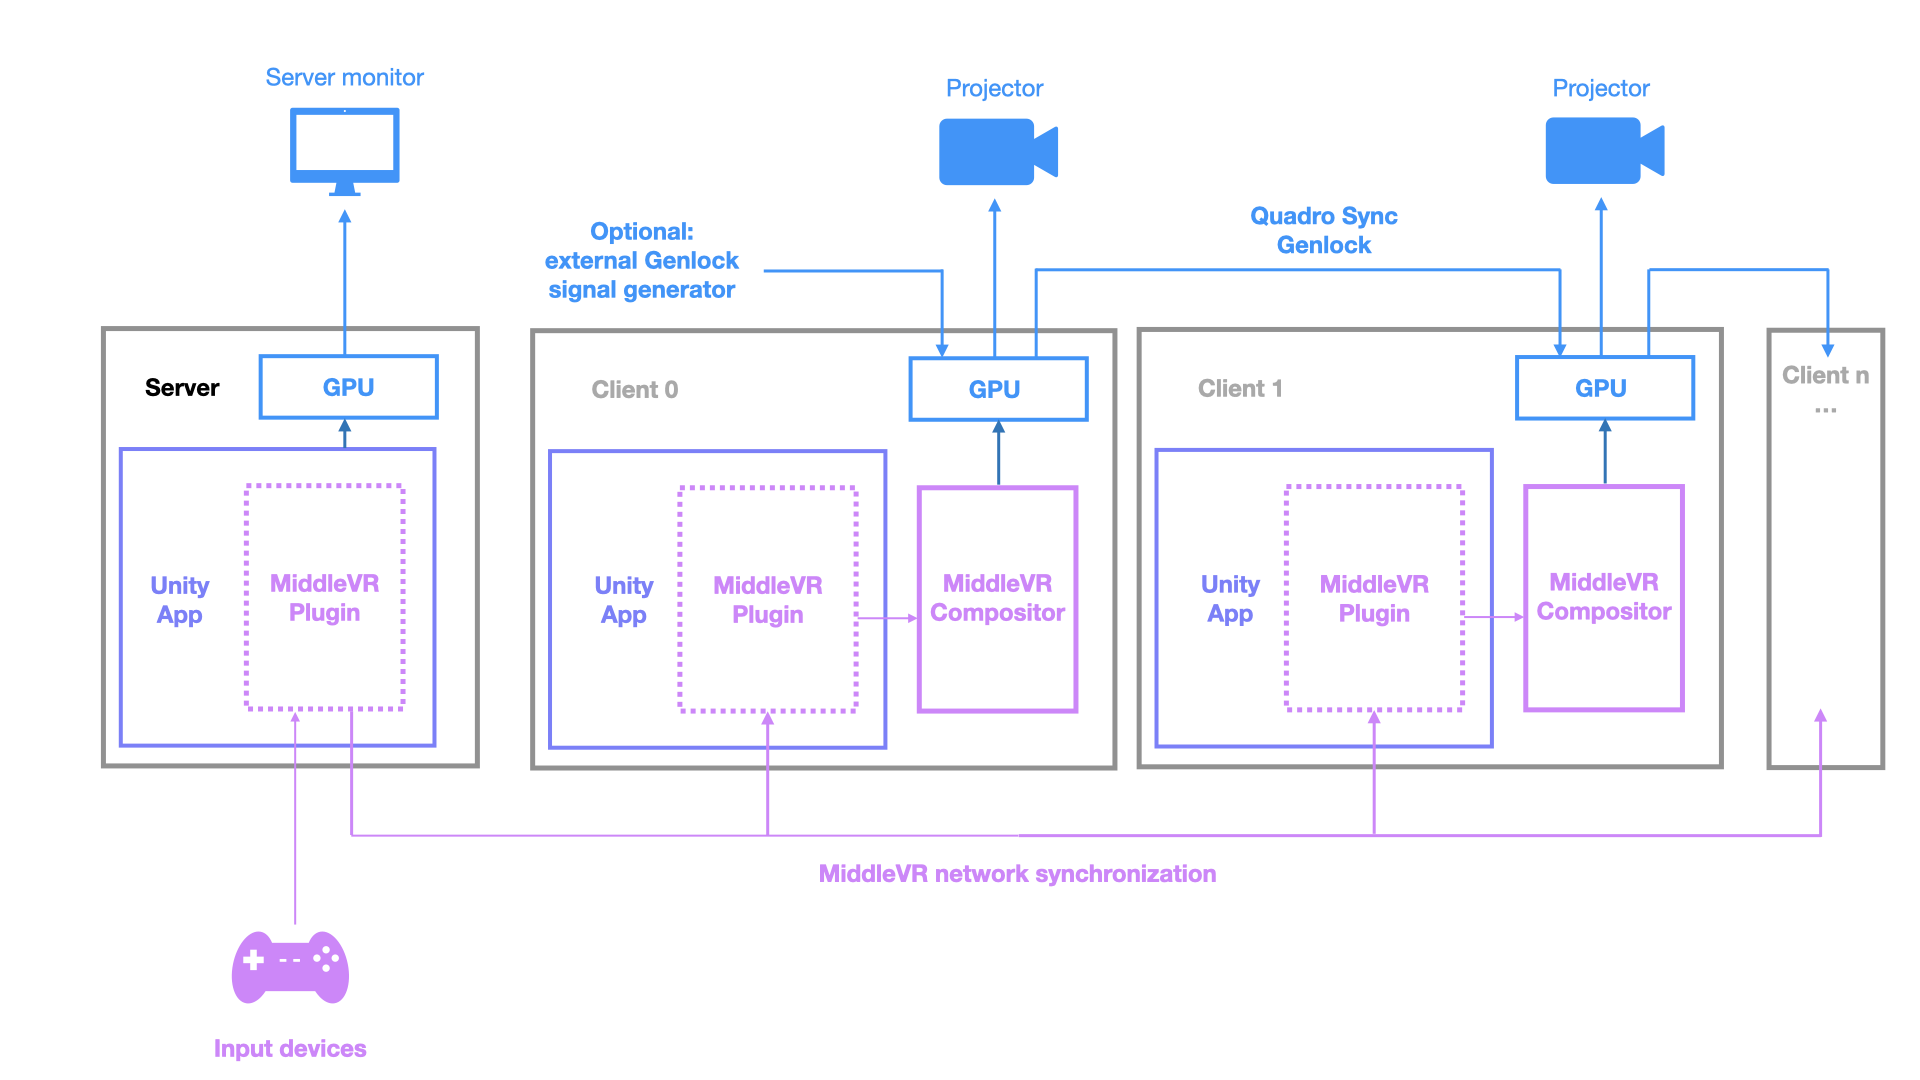
MiddleVR cluster architecture:
- In MiddleVR Config, go to the Cluster tab.
-
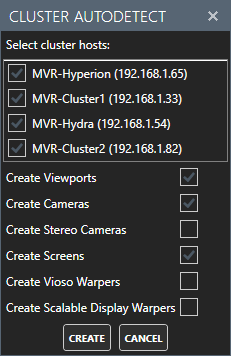
If the MiddleVR daemon is running on all cluster nodes, you can press
Autodetect...to detect all cluster nodes. -
From there you can choose to automatically
Create Viewportsfor all the cluster nodes. If you have already setup Cameras and Screens before, uncheck those options.
-
Cluster Server window: We advise to setup a cluster server on a separate computer to be used as a control/feedback computer. The cluster server window will not use stereoscopy or be part of the genlock sync. Make sure that the feedback window is not too big so as to not slow down the whole cluster. If you setup such a control computer, it is also advised to check
Cluster Options > General > Server Native Windowso that the native Unity window is displayed instead of the MiddleVR compositor. This allows you to display a control 2D GUI for your app that will not be displayed in the Cave. -
Multi-GPU: Make sure to have one cluster node per GPU. You might need to change the layout of your displays in the NVidia control panel or the Windows displays settings to make sure that the window for each cluster node only covers one GPU. We also recommend a multi-gpu setup instead of a Mosaic covering all the GPUs. More information
From there you can already check if there are some issues with your cluster:
-
In the Displays tab, you can check the displays for each Cluster nodes by clicking on the "Cluster Hosts" list on the left
-
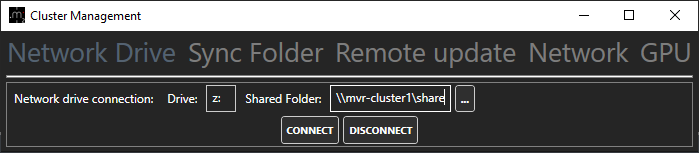
In the Cluster tab, open the
Cluster Managementwindow:
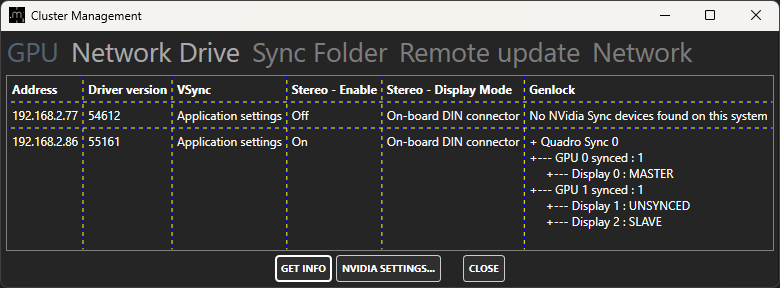
-
In the GPU tab, press "Get Info" and check that the NVidia drivers version is the same on all computers
-
Check that stereoscopy is setup as intended
-
Check that Genlock is setup as intended
-
In the Network tab, check that the ping for each computer is < 1ms
-
You can also check the MiddleVR Daemon version to make sure you have installed/updated them all correctly
Genlock#
-
We advise to test Genlock after everything else is correctly setup
-
For the moment uncheck
Genlockin theCluster tab > Cluster options
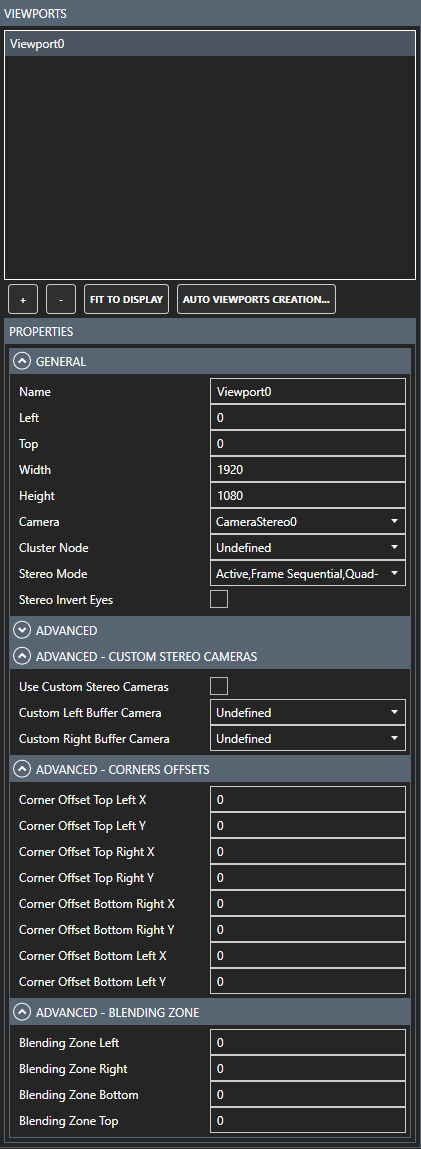
Viewports#
- In case you have not created viewports in the previous Cluster section, go in the Displays tab of MiddleVR Config
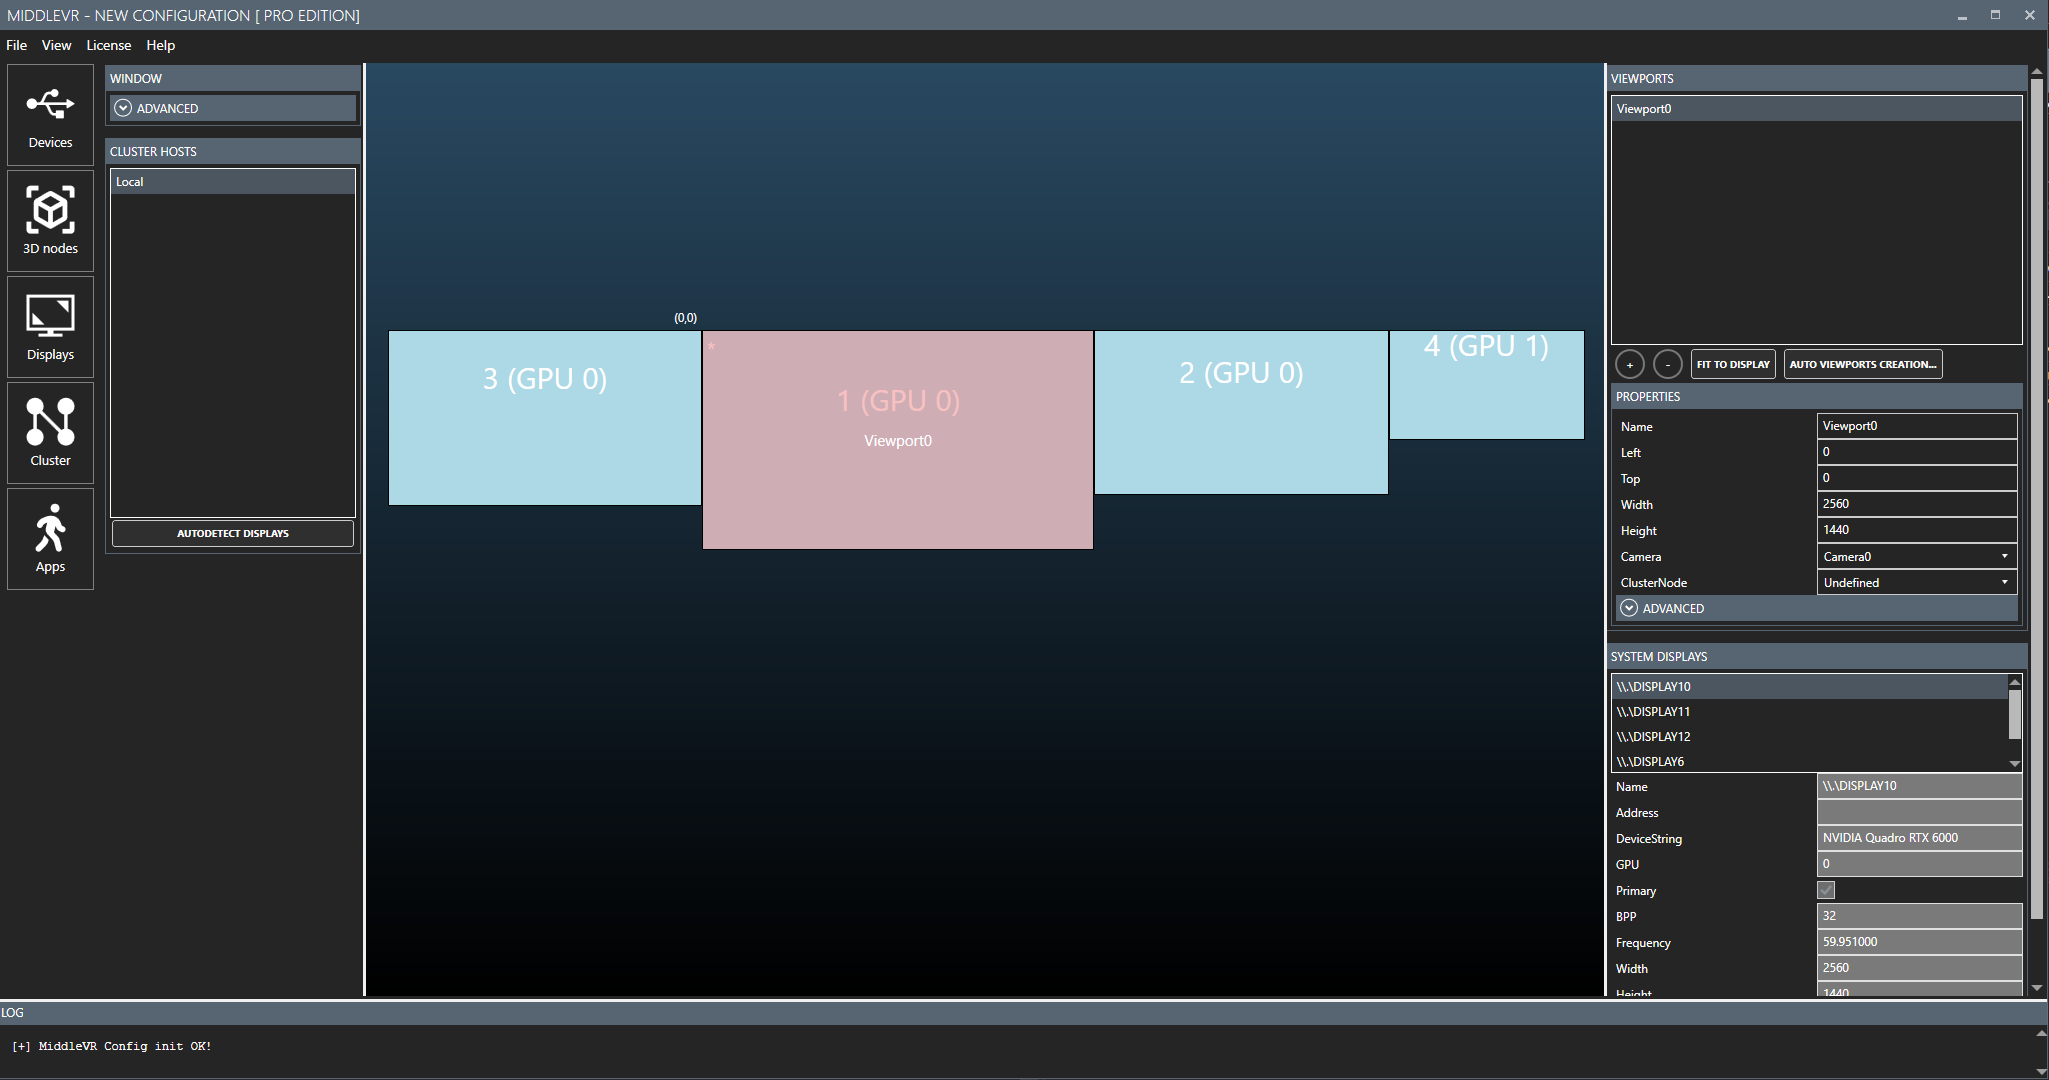
- Make sure that each
Viewportis assigned the correctCameraandStereo Mode. TheCluster Nodeshould automatically be set when choosing the viewport:
- On big systems, the biggest difficulty is to match Viewports and Cameras, i.e. knowing which display in each system should display which camera. See how the Calibration app can help with that.
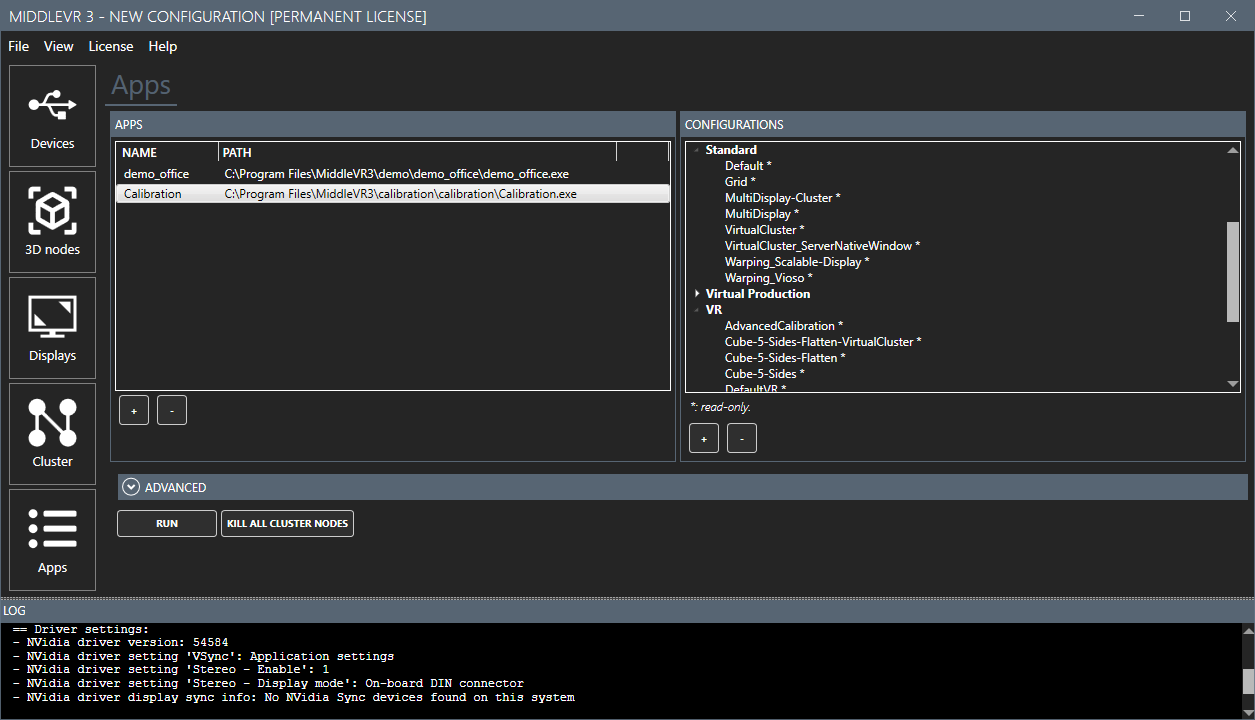
Run the included demo app#
- Go on the
Appstab:
-
Click on the
+button under theAppslist and locateC:\Program Files\MiddleVR3\demo\demo_office\demo_office.exe -
Unlike other demos or your own apps, you don't need to copy this app on the shared network folder because it is installed at the same location by default on all the cluster nodes when installing MiddleVR
-
Select your configuration in the
Configurationslist -
Open the
Advancedpanel and setup the logs folder on the shared network folder, for example inZ:\logs

- Press
Run
-
Hopefully everything is starting and is displayed correctly, congratulations on your first win!
-
Press
ESCto qui the app -
Or press
Kill All Cluster Nodes -
In case of issues:
-
Make sure to re-read this guide carefully
-
Use the Calibration app
-
Contact support: E-mail: support@middlevr.com
-
-
The setup is not finished yet, we will need to setp the tracking and Wand!
Tracking#
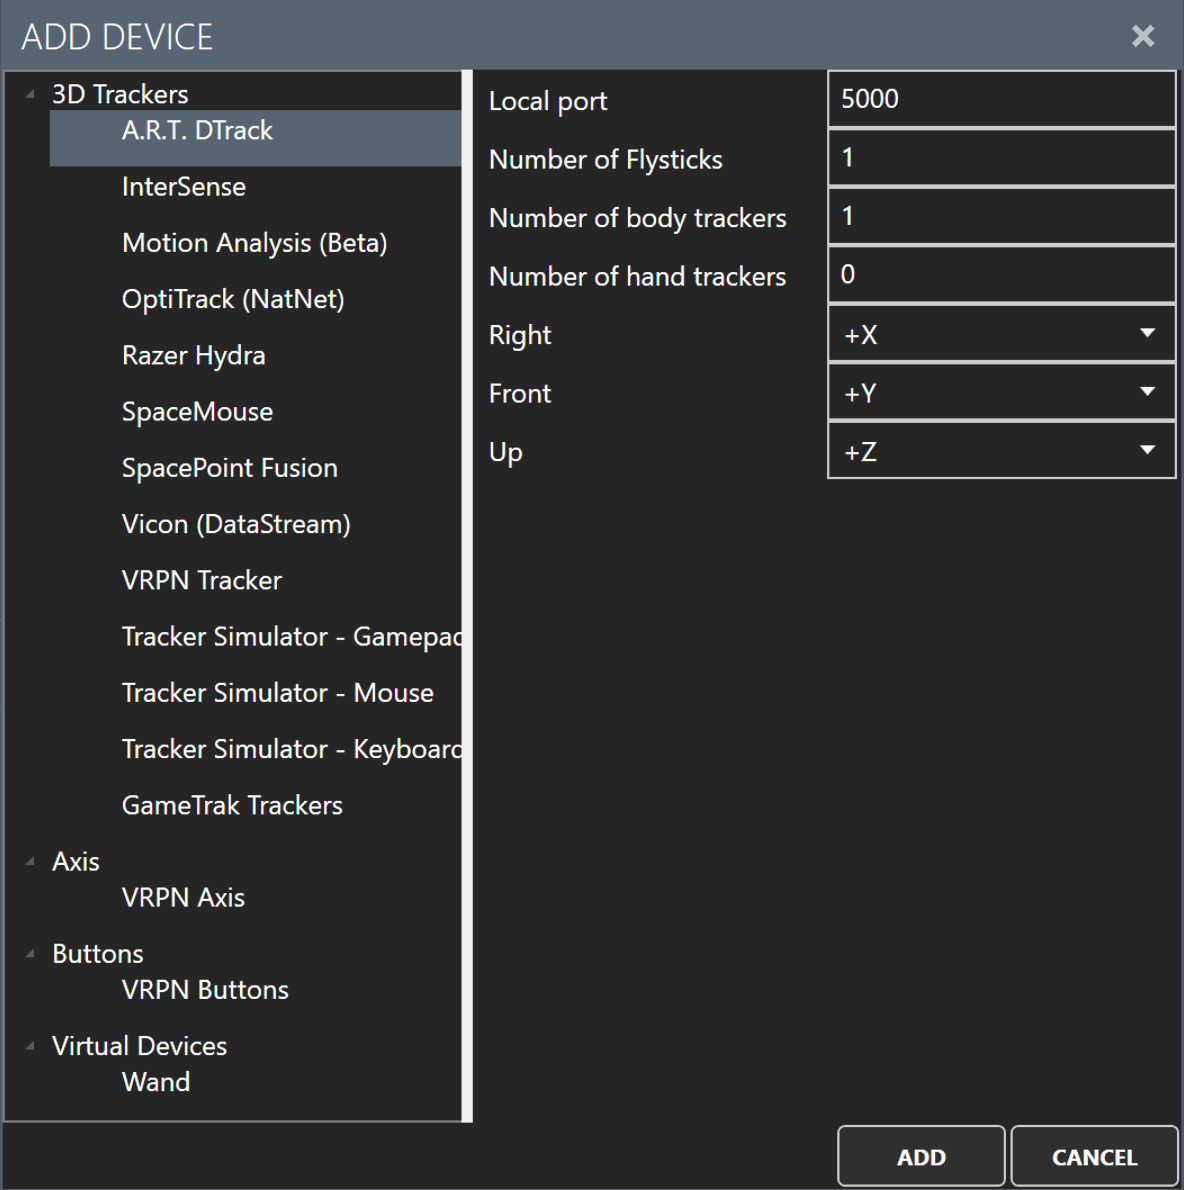
- Go in the Devices tab of MiddleVR Config
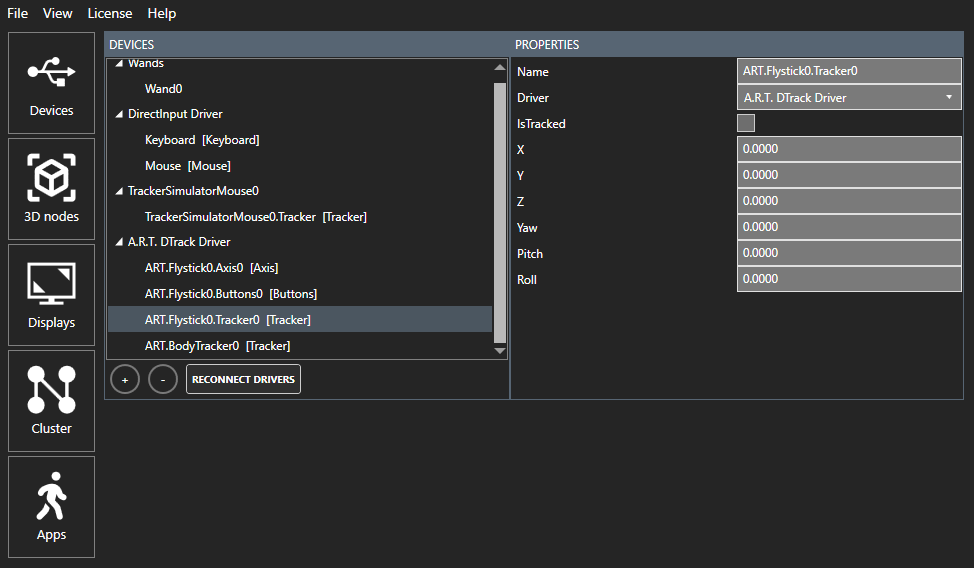
- Click on the
+button:
-
Check that data is correctly updated by clicking on one of the Tracker. If not, check common devices firewall ports
-
See how to setup the X/Y/Z Right/Front/Up axis
Note: Some drivers only allow one app to access them (We are looking at you ART DTrack). This means you cannot get data in MiddleVR config and in a running app at the same time. MiddleVR will then automatically disconnect those drivers when starting an app or losing focus. You need to press Reconnect drivers to get data back.
Best practices:
- The neutral orientation/position of your trackers should be done in the manufacturer's tracking software, such as ART DTrack or Optitrack's Motive:
- When a tracker is in a neutral orientation, it should report Yaw=0, Pitch=0, Roll=0
- For a correctly calibrated depth/distance perception, it is expected that the
HeadNoderepresents the exact center between the two user's physical eyes - If the calibration is not properly done in the manufacturer's tracking software, it can be achieved in MiddleVR with advanced calibration techniques, but it should be much simpler/faster to fix this outside of MiddleVR.
Wand#
- Stay in the Devices tab of MiddleVR Config and click on
Wand0

-
Assign devices to
Wand axisandWand buttons -
Check that the values are correctly updated
-
Modify the buttons index if needed so that your main interaction button is assigned to Button 0
-
If the values are not updated, make sure that the original device is correctly updated
-
Run
demo_office: you should be able to navigate with the Wand Axis and grab objects with Button 0
Finalizing#
-
Enable genlock
-
Use the Calibration app to validate the configuration
-
To speed up the startup times of your app, consider doing a Local copy
-
Consider doing a backup of your MiddleVR configuration and NVidia driver settings
-
Copy other MiddleVR demos on the shared network folder and try them
Troubleshooting performance issues#
When starting you app on a real cluster for the first time, the performances might not be what you expected. There are several potential causes:
- Rendering in stereoscopy or with multiple displays increases the GPU load
- Running one instance of your app per GPU on a multi-GPU system increases the CPU load
- Sharing network data with multiple computers can decrease performances
- Only one computer of the cluster could have specific issues and slow down the whole cluster
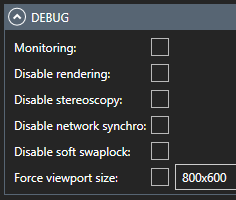
MiddleVR offers some tools to help you pinpoint and thus improve those issues
in the Apps tab Advanced > Debug section
Troubleshoot#
The support website has a lot of resources to help you troubleshoot your setup:
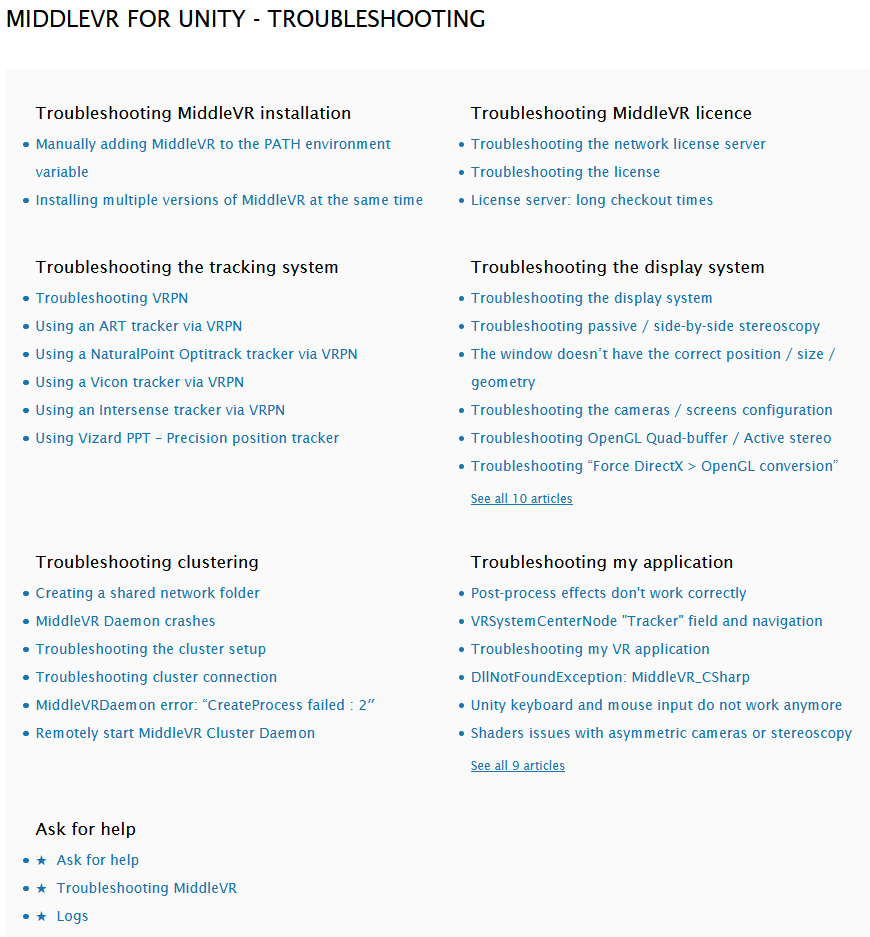
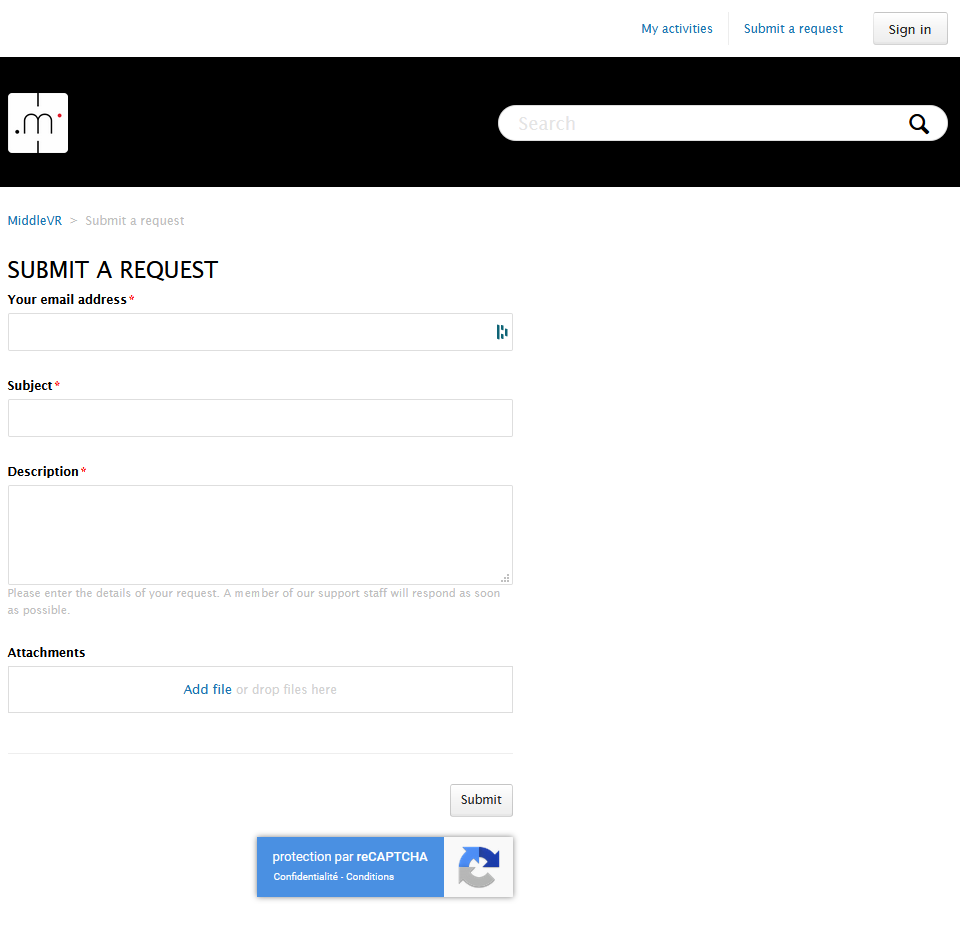
You can also submit a support request:
Advanced#
Local copy#
A local copy of the application on all cluster nodes at the exact same location. The goal is mainly to speed-up the loading process.

MiddleVR config can automatically synchronize a folder by using the Cluster Management - Sync Folder feature:
Creating a shared folder#
Windows 11/10#
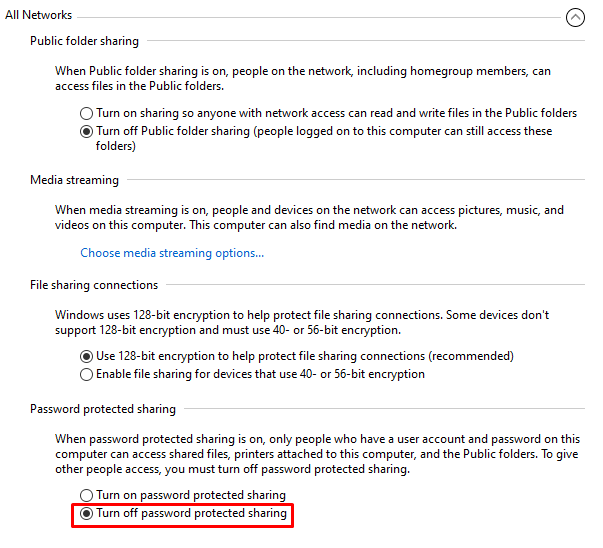
Make sure Windows has file sharing enabled in
Windows Settings > Managed Advanced Sharing Settings

Windows 11: Right-click on your folder, select Show more options > Properties, go in the Sharing tab:
Windows 10: Right-click on your folder, select Properties, go in the Sharing tab:
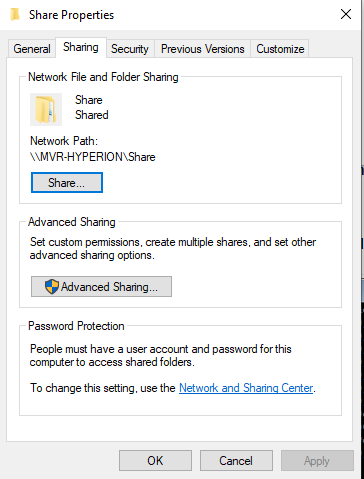
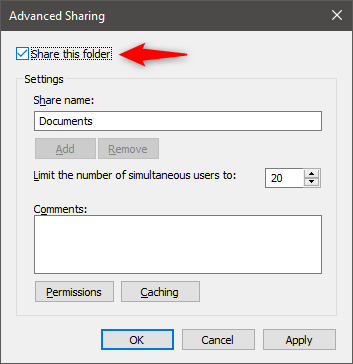
Click on "Advanced Sharing" and enable "Share this folder":
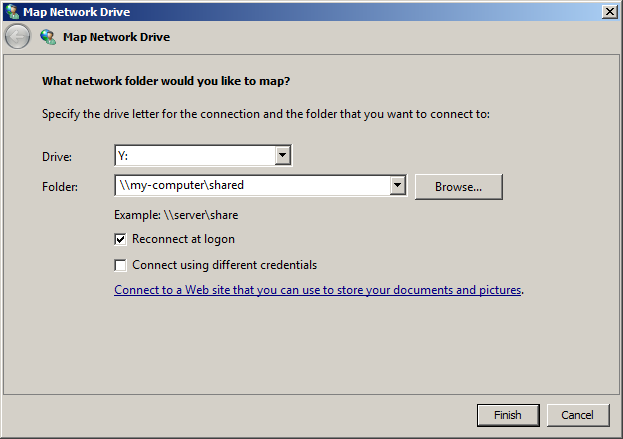
Manually connecting a network drive#
Right click on your computer in the file explorer and selecting "Map a network driver":

Make sure to mount the folder with the same drive on all computers, including the server: