Configure Display
Configuring display#
Windows scale#
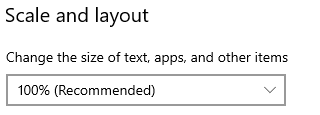
Since version 3.1, MiddleVR should correctly handle windows scale and display a full resolution window, not a scaled down one. For previous versions, make sure Windows Scale is 100% for all individual displays. Windows tends to change the scale automatically for 4K displays for example. The NVidia drivers can also have scale settings. For further information, see Windows scale in MiddleVR's knowledge base.
Viewport#
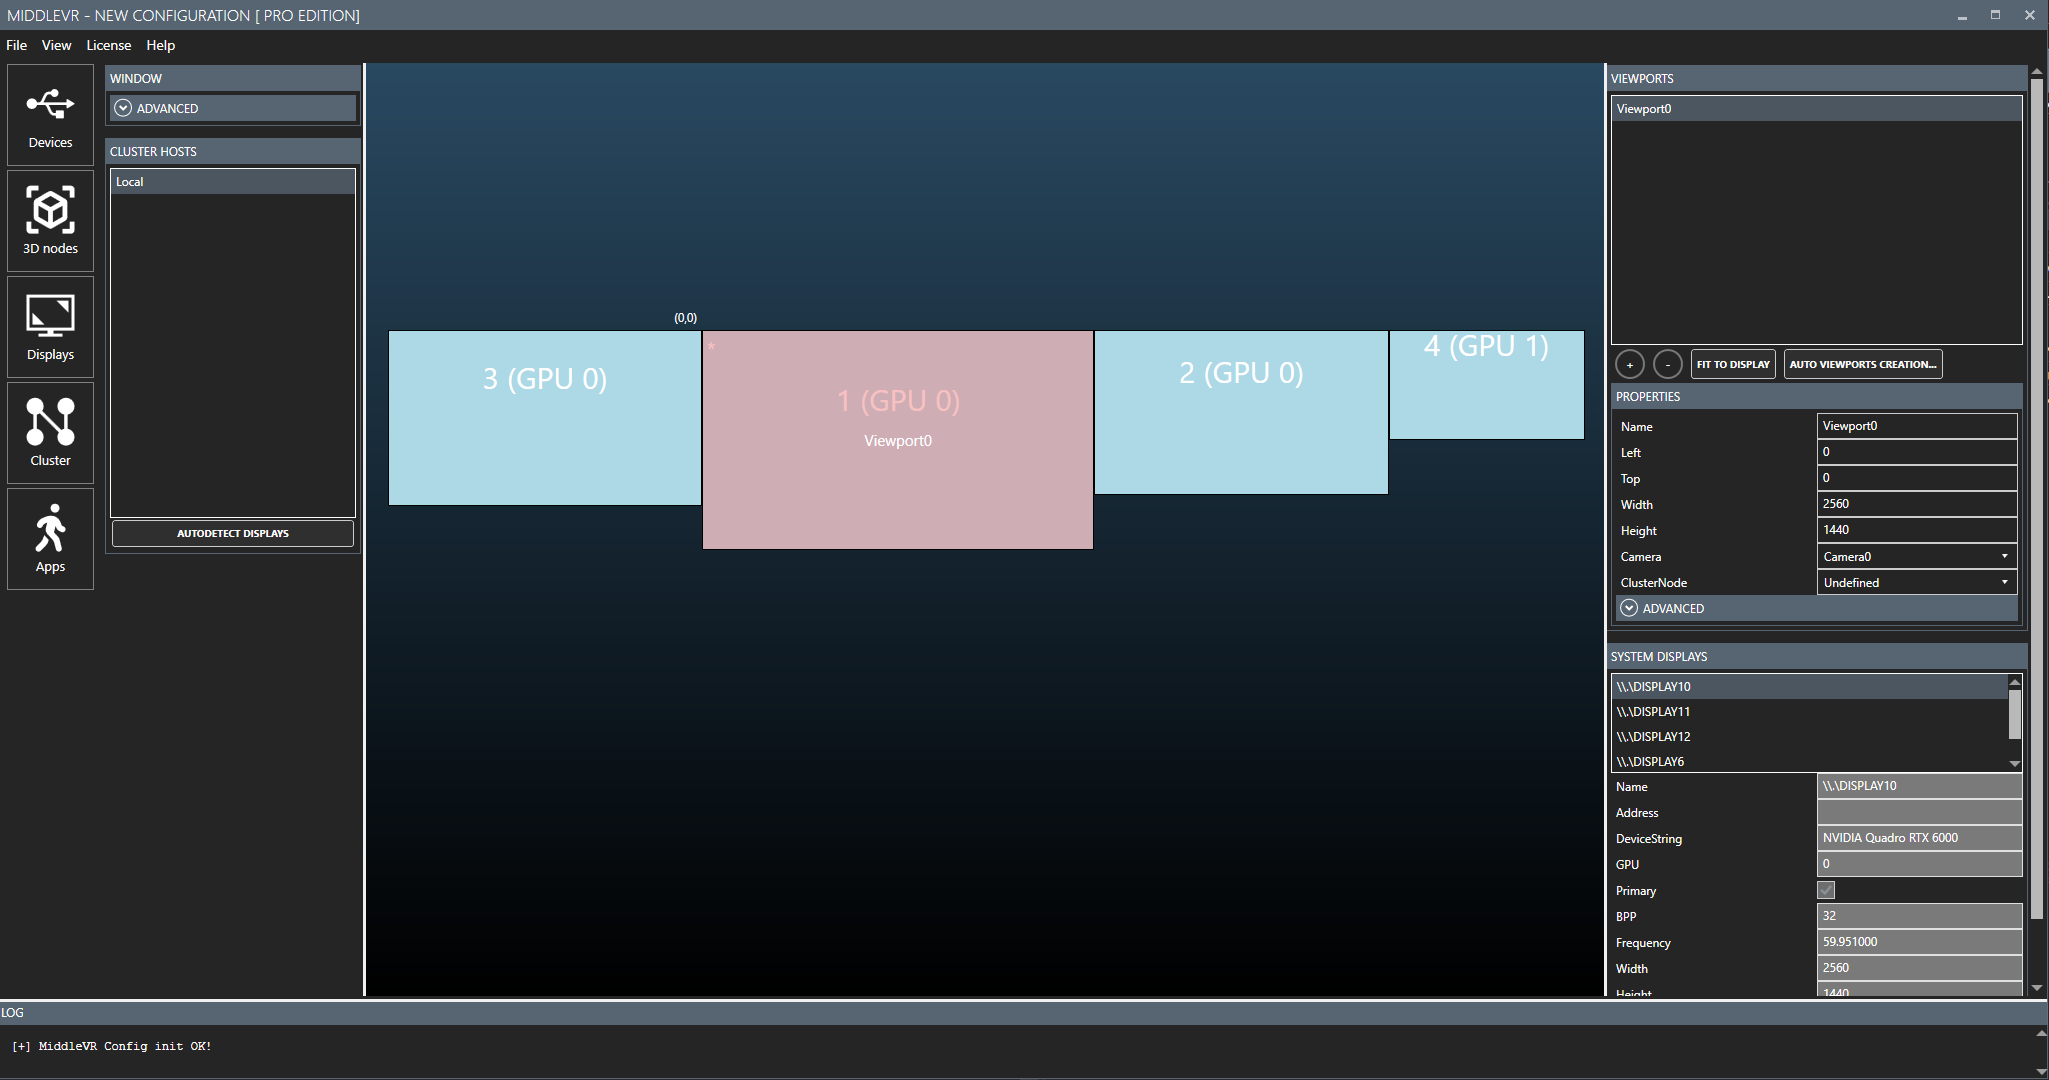
A viewport is a rectangular area on your desktop in which your camera will display its rendering. A viewport must be assigned a camera.
Actions#
- "+ ...":
- "Fit to display": Will maximise the viewport to match the display
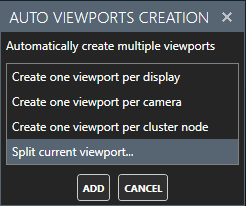
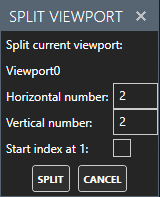
Split viewport:
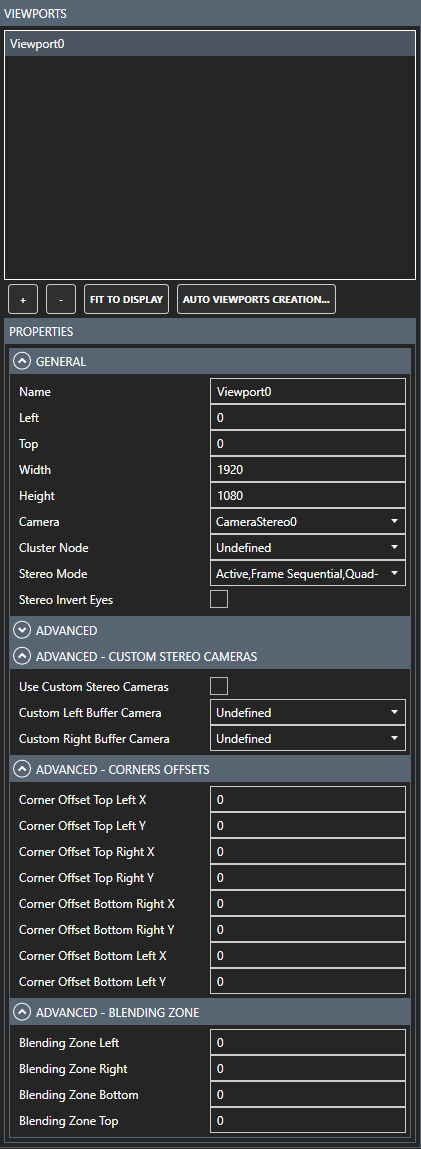
Properties#
-
Name : Name of the viewport
-
Left : The left pixel coordinate of the viewport. Can be negative, to display on a secondary monitor for example.
-
Top : The top pixel coordinate of the viewport. Can be negative, to display on a secondary monitor for example.
-
Width : Width of the viewport in pixels.
-
Height : Height of the viewport in pixels.
-
Camera : The camera assigned to this viewport. Required.
-
Cluster Node : To which cluster node is this camera assigned.
-
Stereo Mode : The stereoscopic mode of the viewport. Will be enabled only if the Camera is a Stereoscopic camera. "Active, Frame Sequential, Quad-Buffer": This is the mode for active stereoscopy. "Side-by-side": This is the mode for passive stereoscopy.
-
Stereo Invert Eyes : Reverse the left-right eye rendering. Will be enabled only if the Camera is a Stereoscopic camera.
Advanced Properties#
-
Use Custom Stereo Cameras : On very specific stereoscopic systems, you might need to choose custom left and right cameras for a viewport. This option allows for this.
-
Render Texture Offset X/Y: If the camera is rendering to a texture, you can specify the offset from the render texture, from its top left corner. See Camera Render To Texture.
-
Corner Offsets : Offsets in pixel. Positive X is right, positive Y is up. See Corners offsets.
-
Blending Zones : Size of the blending zones in pixels from the border. See Blending.
Corners Offsets - Homography#
Compatibility: Built-in pipeline, URP. If you need HDRP, contact us.
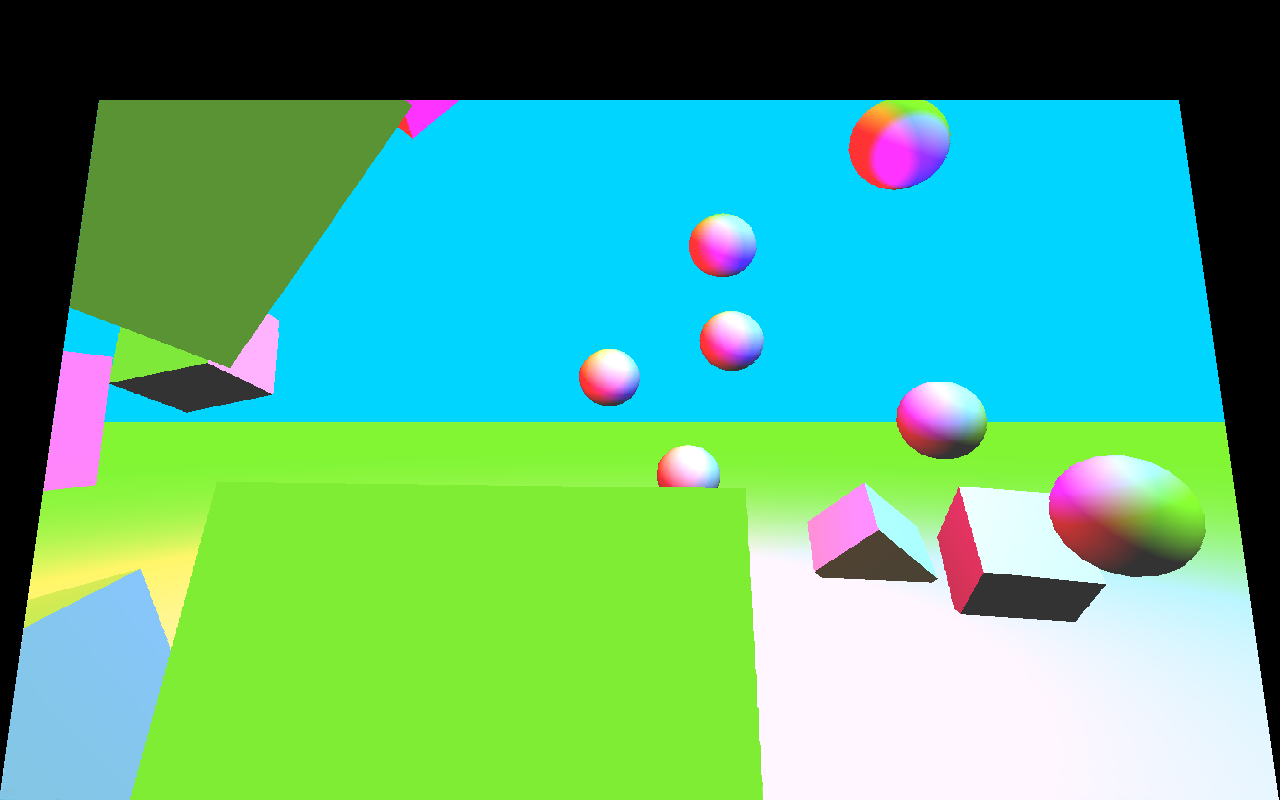
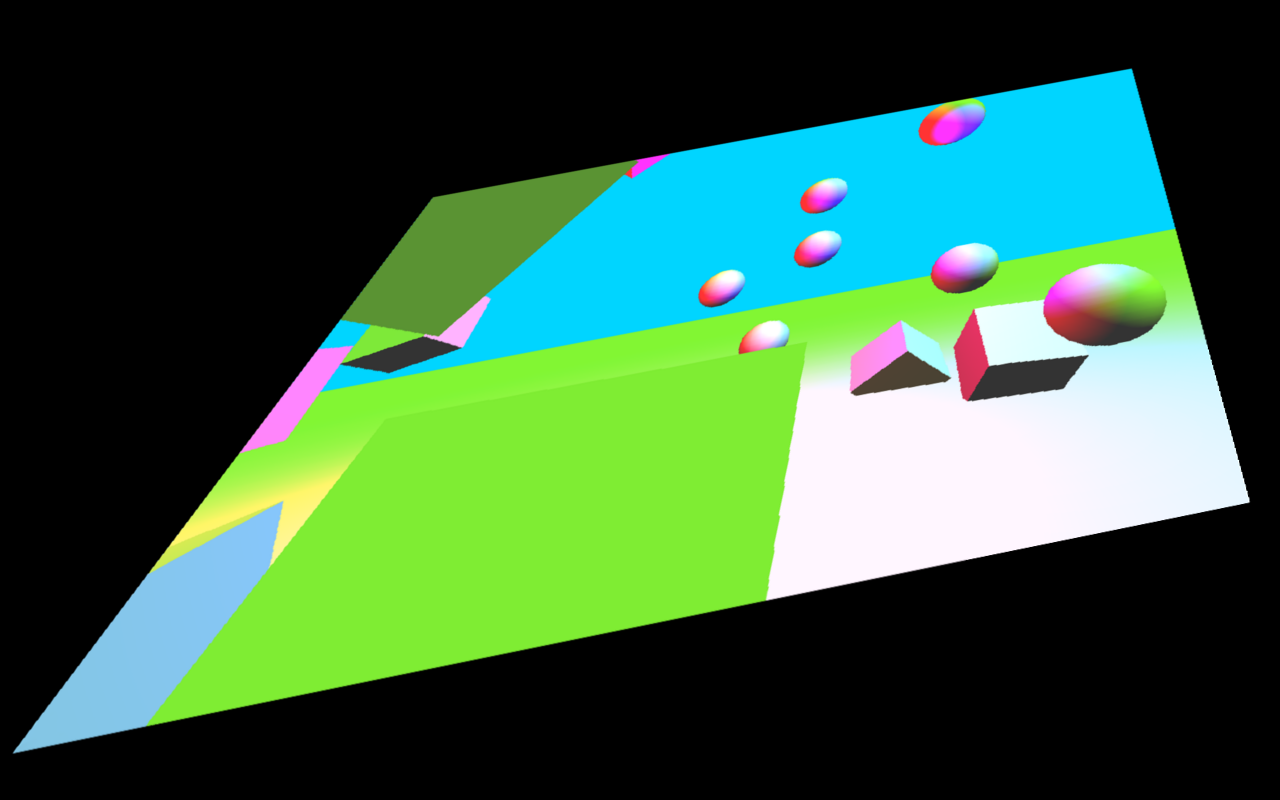
In some cases, a homography transformation is needed on the displayed image to straighten the final visual result. This technique is particularly helpful to calibrate projector displays.
Change these offsets coordinates will stretch the viewport to fit the geometry described by the four points. Here is an example showing the same view with no homography and with homography using the viewport coordinates with a ( 100, -100 ) pixels offset for the top left corner and a ( -100, -100 ) pixels offset for the top right corner.
With homography:
You can correct a basic keystone, but you can go even further in the correction:
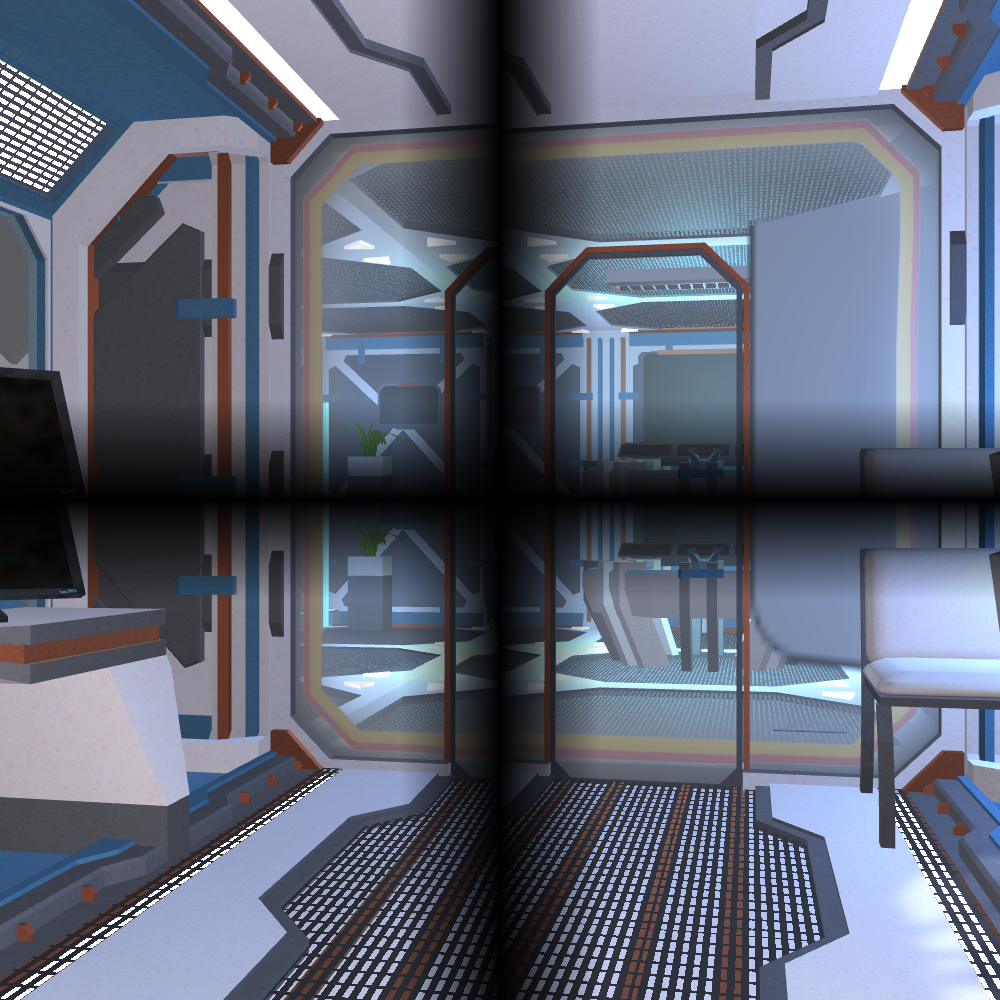
Blending#
Blending zones can be entered manually, or automatically computed if you use Horizontal/Vertical blending in Screens Array.
This example shows four viewports with blending:
Window#
MiddleVR will create a single window per cluster node that contains all its viewports.
You must ensure that each window covers exactly only one GPU, which can include multiple displays.
Having one cluster node per GPU, covering all the displays of this GPU, is recommended to get the best performances.
If you encounter the error:
** Could not find matching DXGI adapter. This probably means that the window is not entirely within one GPU or has parts outside the Windows desktop.
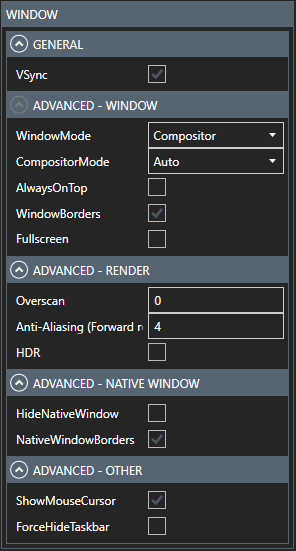
You can control the behavior of the window with the following properties:
-
Window Mode : Choose how MiddleVR will display the images. "Compositor": Will open a new compositor window and hide the native's Unity window. "Native Window": Will keep native Unity window. Compositor is required for cluster and/or active stereoscopy. Compositor is required for DirectX 12 support.
-
Compositor Mode : If WindowMode is Compositor, choose the compositor renderer. Auto, OpenGL, Direct3D11. If unsure set to Auto.
-
Always On Top : Will the window remain above all other windows?
-
Window borders : Add compositor window borders to be able to move it.
-
Fullscreen: Compositor window will change the resolution of the display and be fullscreen.
-
Show Mouse Cursor : Hide the mouse cursor if set to false.
-
VSync : Will the window wait for vertical synchronization? This will be forced to true when an active stereoscopy viewport is detected.
-
Anti-Aliasing : Sets the anti-aliasing level. Currently only available in Forward Rendering.
-
HDR : Enable High Dynamic Range. See HDR.
-
Force Hide Taskbar : On some systems the Windows Taskbar is not correctly hidden. This parameter uses a more aggressive technique to hide it.
-
Overscan : See Overscan.
-
Hide Native Window : Hide the native (Unity) window.
-
Native Window Borders : Add native window borders to be able to move it.
Multi-GPU#
If your system has multiple graphics card in one computer and is not using NVidia Mosaic, you must create a cluster node per GPU.
This will run a Unity instance per GPU, which is the best way to get the best performances out of your multi-gpu system.
MiddleVR Config will display the relevant GPU for each displays, both visually and in each individual display properties:

MiddleVR will automatically identify the correct GPU for each cluster node based on the origin of its window. MiddleVR will create only one window per cluster node, so you need to ensure that each window covers only one GPU. A window covering multiple GPUs will disable stereoscopy and degrade performances, or could also result in an error, see Window.
You might need to change the layout of your displays in the NVidia control panel or the Windows displays settings to make sure that the window for each cluster node only covers one GPU.
If you cannot change the layout of your displays, you can always create one cluster node for each display. This would not result in the optimal performances but is not catastrophic either.
Nvidia Mosaic#
According to Nvidia, Mosaic is a technology that lets the system views multiple displays as a single unified desktop environment without software customization or performance degradation. However our in-house tests showed that one GPU only was used with Mosaic whereas our Multi-GPU option used significantly every GPU. With deferred-rendering, we even reached x2 better performances between Multi-GPU and Mosaic with two graphics cards.
Nevertheless the Multi-GPU option comes at a price because it forces the use of clustering and so to manage its difficulties. See section Cluster concepts.
HDR#
MiddleVR supports Unity's HDR rendering (beta) for the built-in render pipeline, URP & HDRP. The preview window in Unity Editor is also able to display HDR with all the pipelines.
HDR requires that:
-
WindowMode is Compositor
-
CompositorMode is Auto or Direct3D11
HDR is compatible with:
-
Direct3D 11
-
Direct3D 12
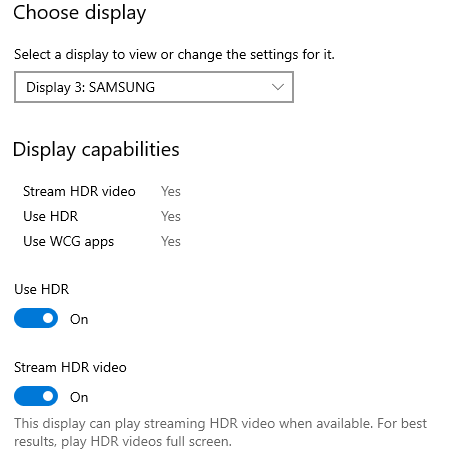
Windows setup#
Make sure Windows correctly detects the display as HDR:
Built-in render pipeline#
In Edit > Project Settings... > Graphics > Tier settings
make sure that Use HDR is enabled and HDR mode is FP16:

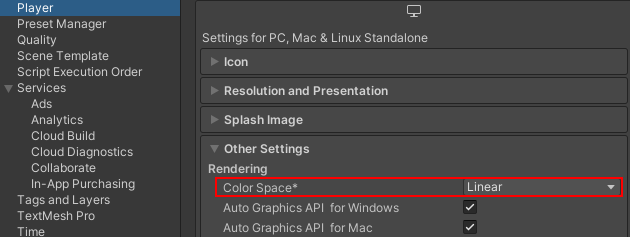
In Edit > Project Settings... > Player > Other settings
make sure that Color Space is Linear:
URP#
Make sure that:
- in Assets/Settings/UniversalRP-HighQuality > Quality > HDR is enabled and Post-processing Grading Mode is High Dynamic Range.
Things that break HDR in URP:
-
Make sure anti-aliasing is not FXAA
-
Disable Tonemapping
-
Disable Film Grain
HDRP#
Things that break HDR in HDRP:
-
Make sure anti-aliasing is not FXAA
-
Disable Tonemapping
-
Disable Film Grain
-
Disable Dithering